Configuring a sink sends data to your Kafka topic instead of the default Postgres database.
sim.toml Configuration
To enable streaming to an external sink, you must define it within your sim.toml file under a new [[env.<name>.sinks]] table. You can define multiple sinks for different environments. For example, you might have one sink for dev and another for prod.
The configuration maps specific events from your listener to specific topics in your Kafka cluster.
Here is an example configuration for a development environment named dev:
sim.toml
Sink Parameters
| Parameter | Required | Description |
|---|---|---|
type | Yes | The type of sink. Currently, the only supported value is "kafka". |
name | Yes | A unique name for this sink configuration within the environment. |
brokers | Yes | An array of broker addresses for your Kafka cluster. |
username | Yes | The username for authenticating with your Kafka cluster. |
password | Yes | The password for authenticating with your Kafka cluster. |
sasl_mechanism | Yes | The SASL mechanism to use. Supported values are "PLAIN", "SCRAM_SHA_256", and "SCRAM_SHA_512". |
event_to_topic | Yes | A map where the key is the name of the event emitted by your listener and the value is the destination Kafka topic name. For example, "PoolCreated" might map to "uniswap_pool_created_dev". |
compression_type | No | The compression codec to use for compressing messages. Supported values are "GZIP", "SNAPPY", "LZ4", and "ZSTD". |
Store Credentials in .env
To avoid commiting your username and password, you can reference environment variables in your sim.toml file.
Place credentials in a .env file and use ${VAR_NAME} placeholders in sim.toml.
.env
sim.toml
sim.toml.
Deploy with a Sink Environment
After you have configured your sink insim.toml, you must explicitly deploy your application using the CLI with the sim deploy command and specify which environment to use. This is different from the automatic deployment that occurs when you push changes to your repository.
To use Kafka sinks, you must use the --environment flag with the sim deploy command. The name you provide to the --environment flag must exactly match the environment name defined in your sim.toml file. For example, if you defined [[env.dev.sinks]], you would use dev as the environment name.
Deployment Output and Tracking
When you successfully deploy with a sink environment, the command will output deployment details including a unique Deployment ID. Here’s an example of what the output looks like:Delete a Sink Environment Deployment
To stop data streaming to your Kafka topics, you need to delete the specific deployment that was created with the sink environment. This is the only way to stop the writing to the sink from the Sim side. Use thesim deploy delete command with the deployment ID:
sim deploy command. If necessary, you can also retrieve the deployment ID by visiting the developer portal where it’s displayed in the Current Deployment section.
The deployment will be deleted almost immediately upon successful execution, which will stop all existing writes to your Kafka topics.
Additional Kafka Cleanup: After deleting the deployment, you may also need to clean up resources on the Kafka side (topics, ACLs, etc.) depending on your setup and requirements. This cleanup should be done directly in your Kafka provider’s console or CLI.
Redeploy Without Sinks
After deleting a deployment that was using sinks, you can redeploy without sinks by using the standard Git deployment method. Push changes to your repository, which will create a deployment that writes only to the default Postgres database. For more information on standard deployments, see the Deployment guide.Set up Redpanda Cloud
Create a Cluster
First, create a new serverless cluster from the Clusters dashboard. Click Create cluster, select the 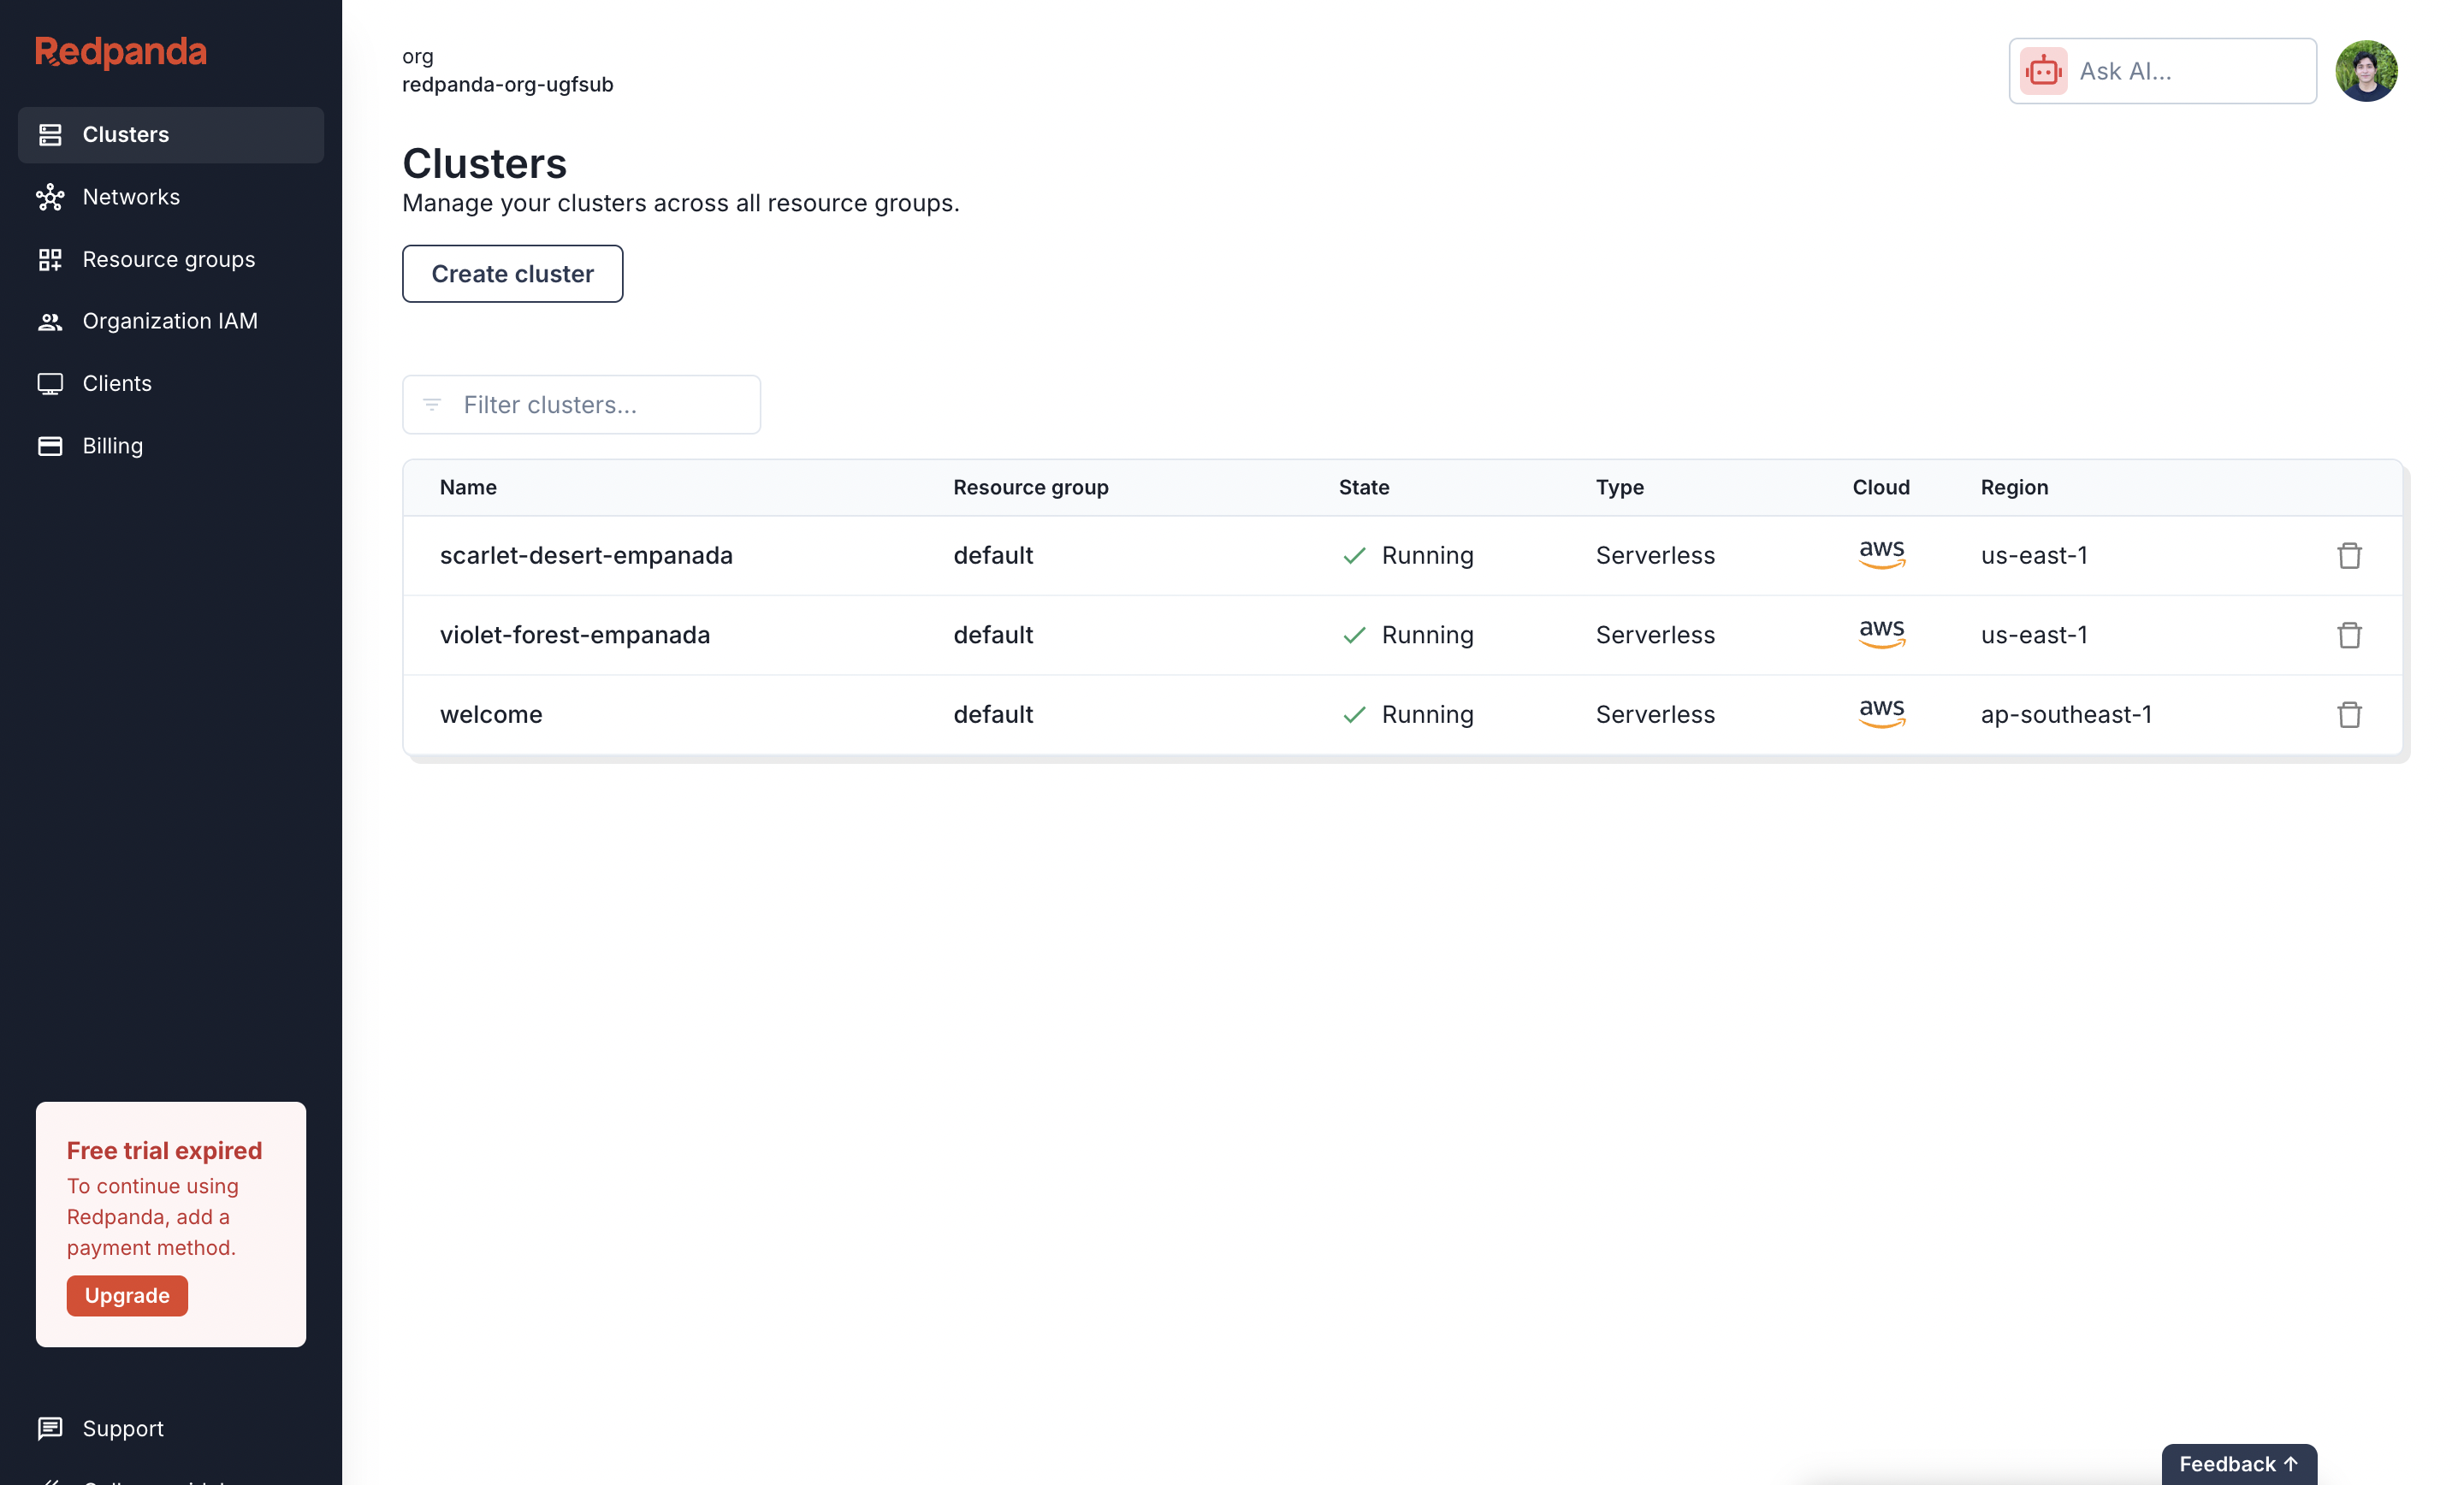
Serverless type, provide a Cluster name, choose your cloud provider and region, and then click Create.Get the Bootstrap Server URL
Once the cluster is running, you can get the connection URL. On the cluster’s Overview page, select the Kafka API tab and copy the Bootstrap server URL. This value is used for the 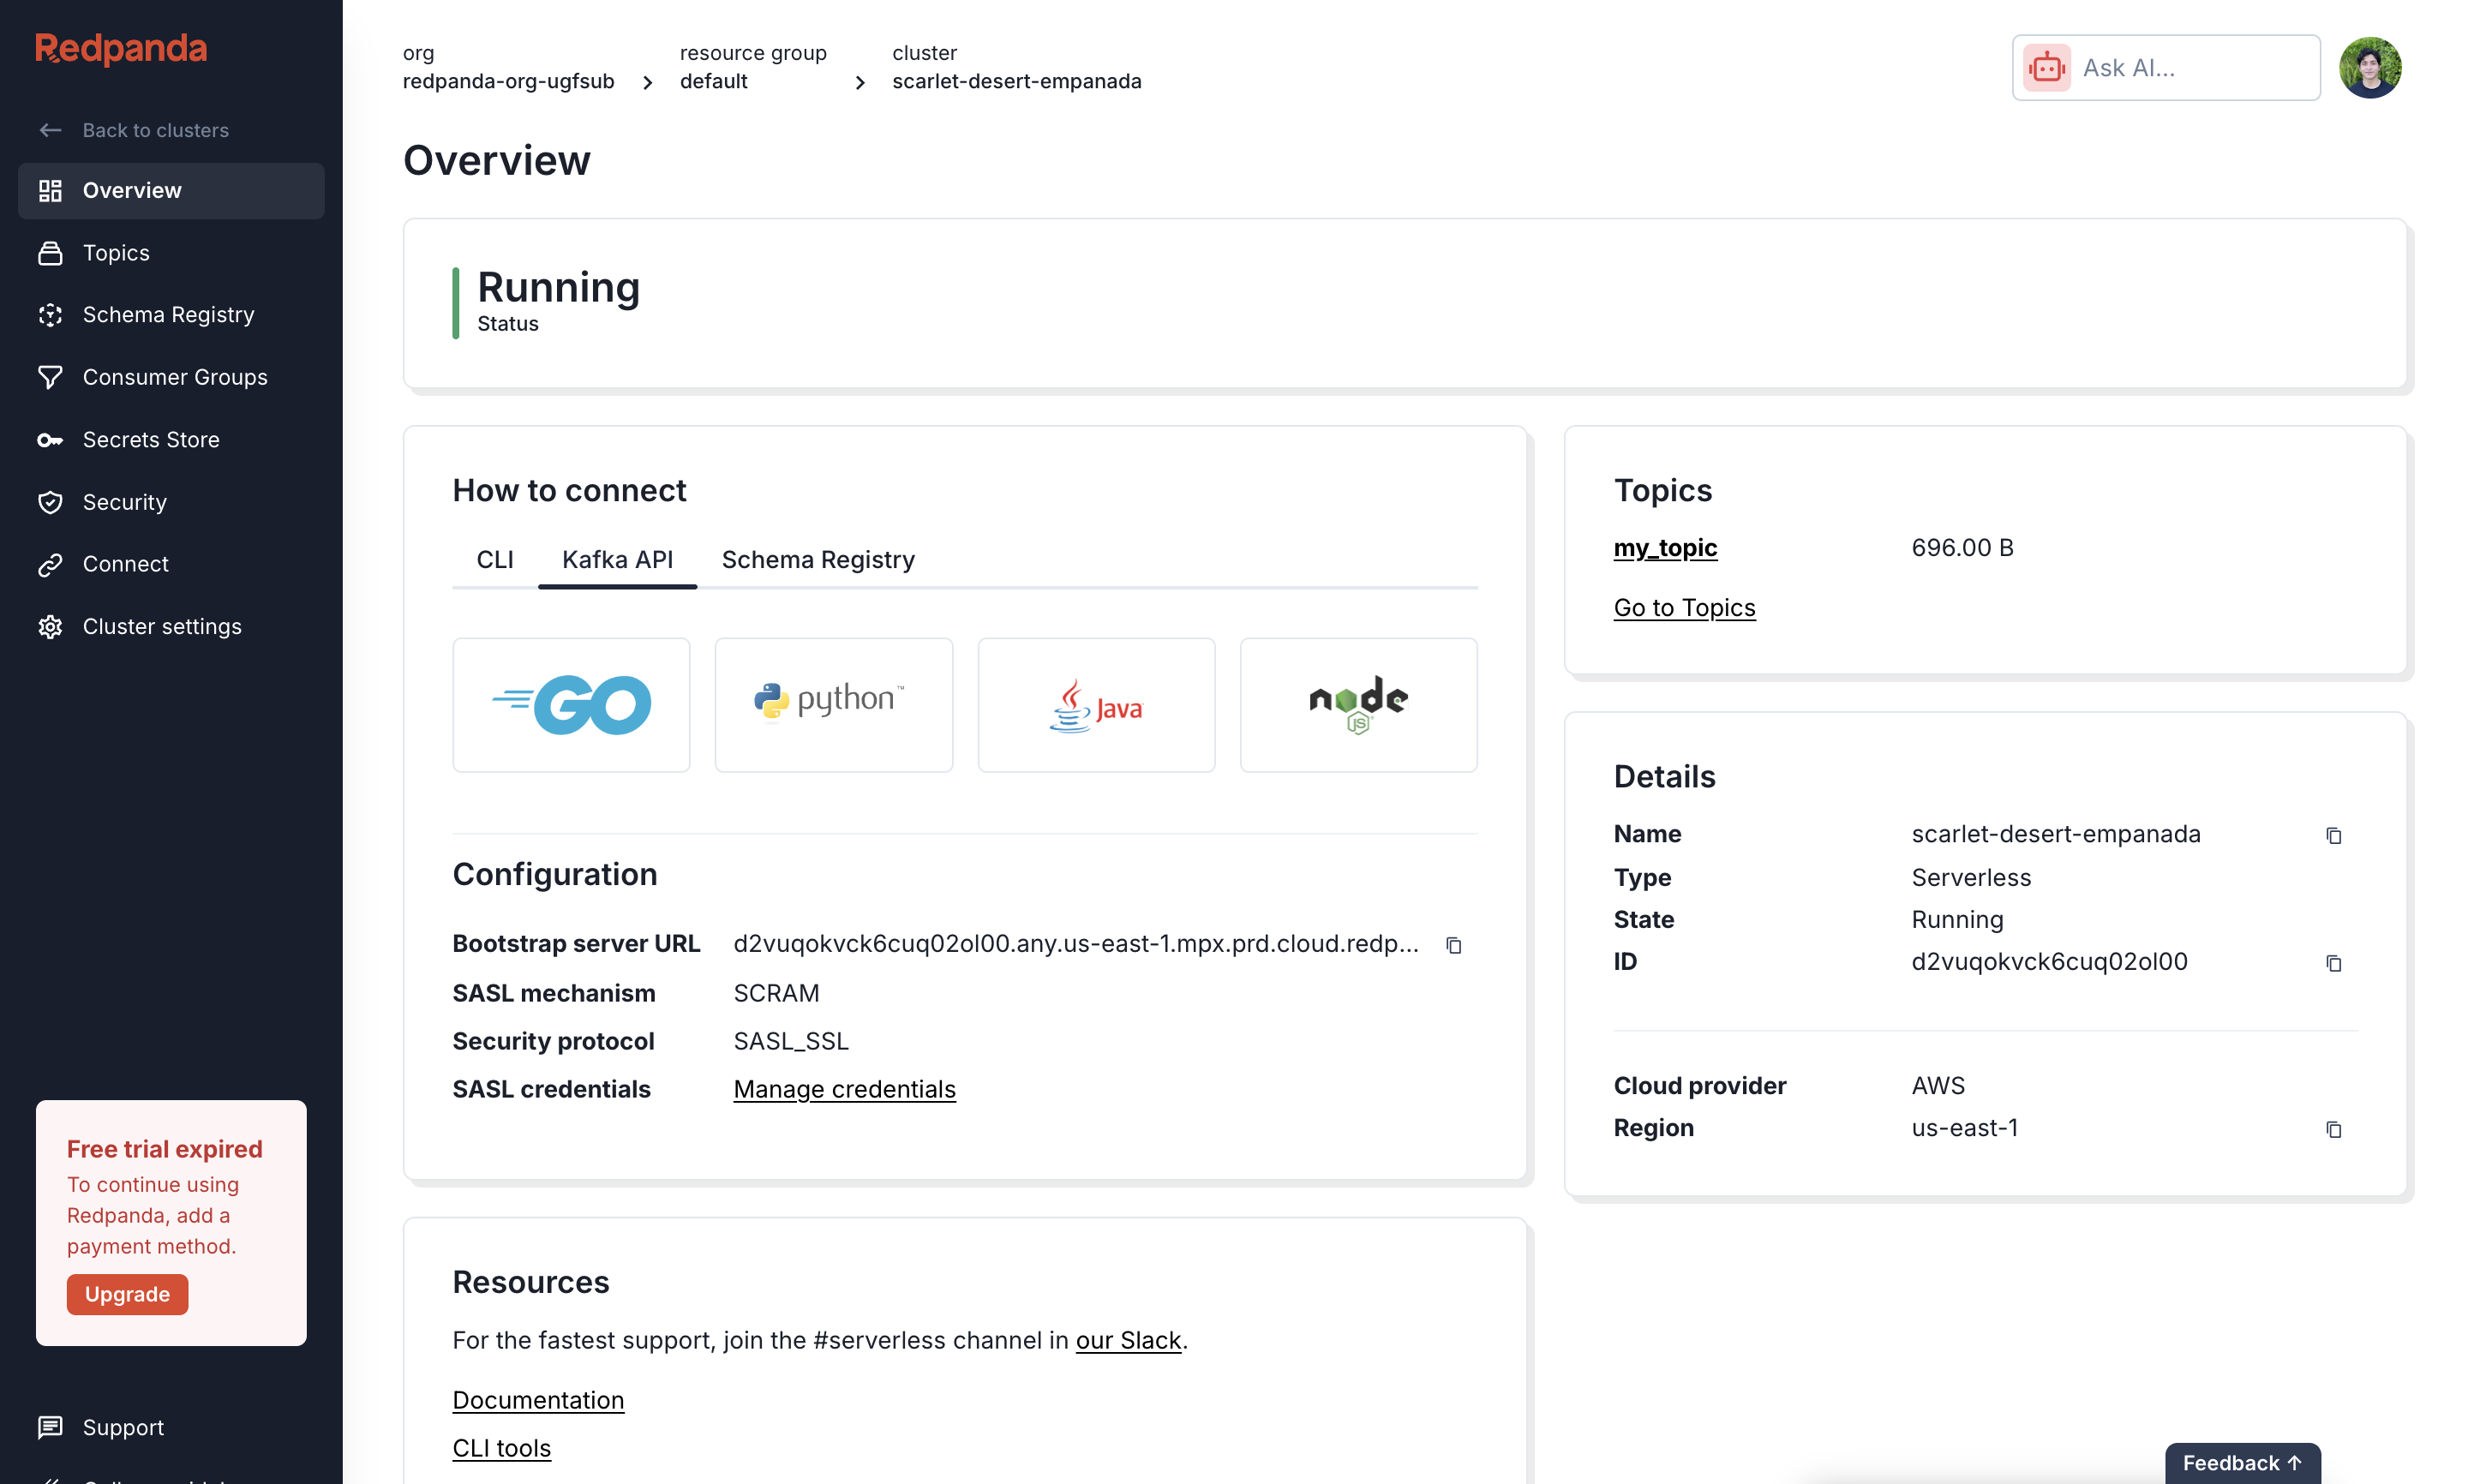
brokers field in your sim.toml file.Create a Kafka Topic
Next, create the topic where your listener events will be sent. From the cluster’s navigation menu, select Topics and click Create topic. Enter a Topic Name, which is the name you will use in your 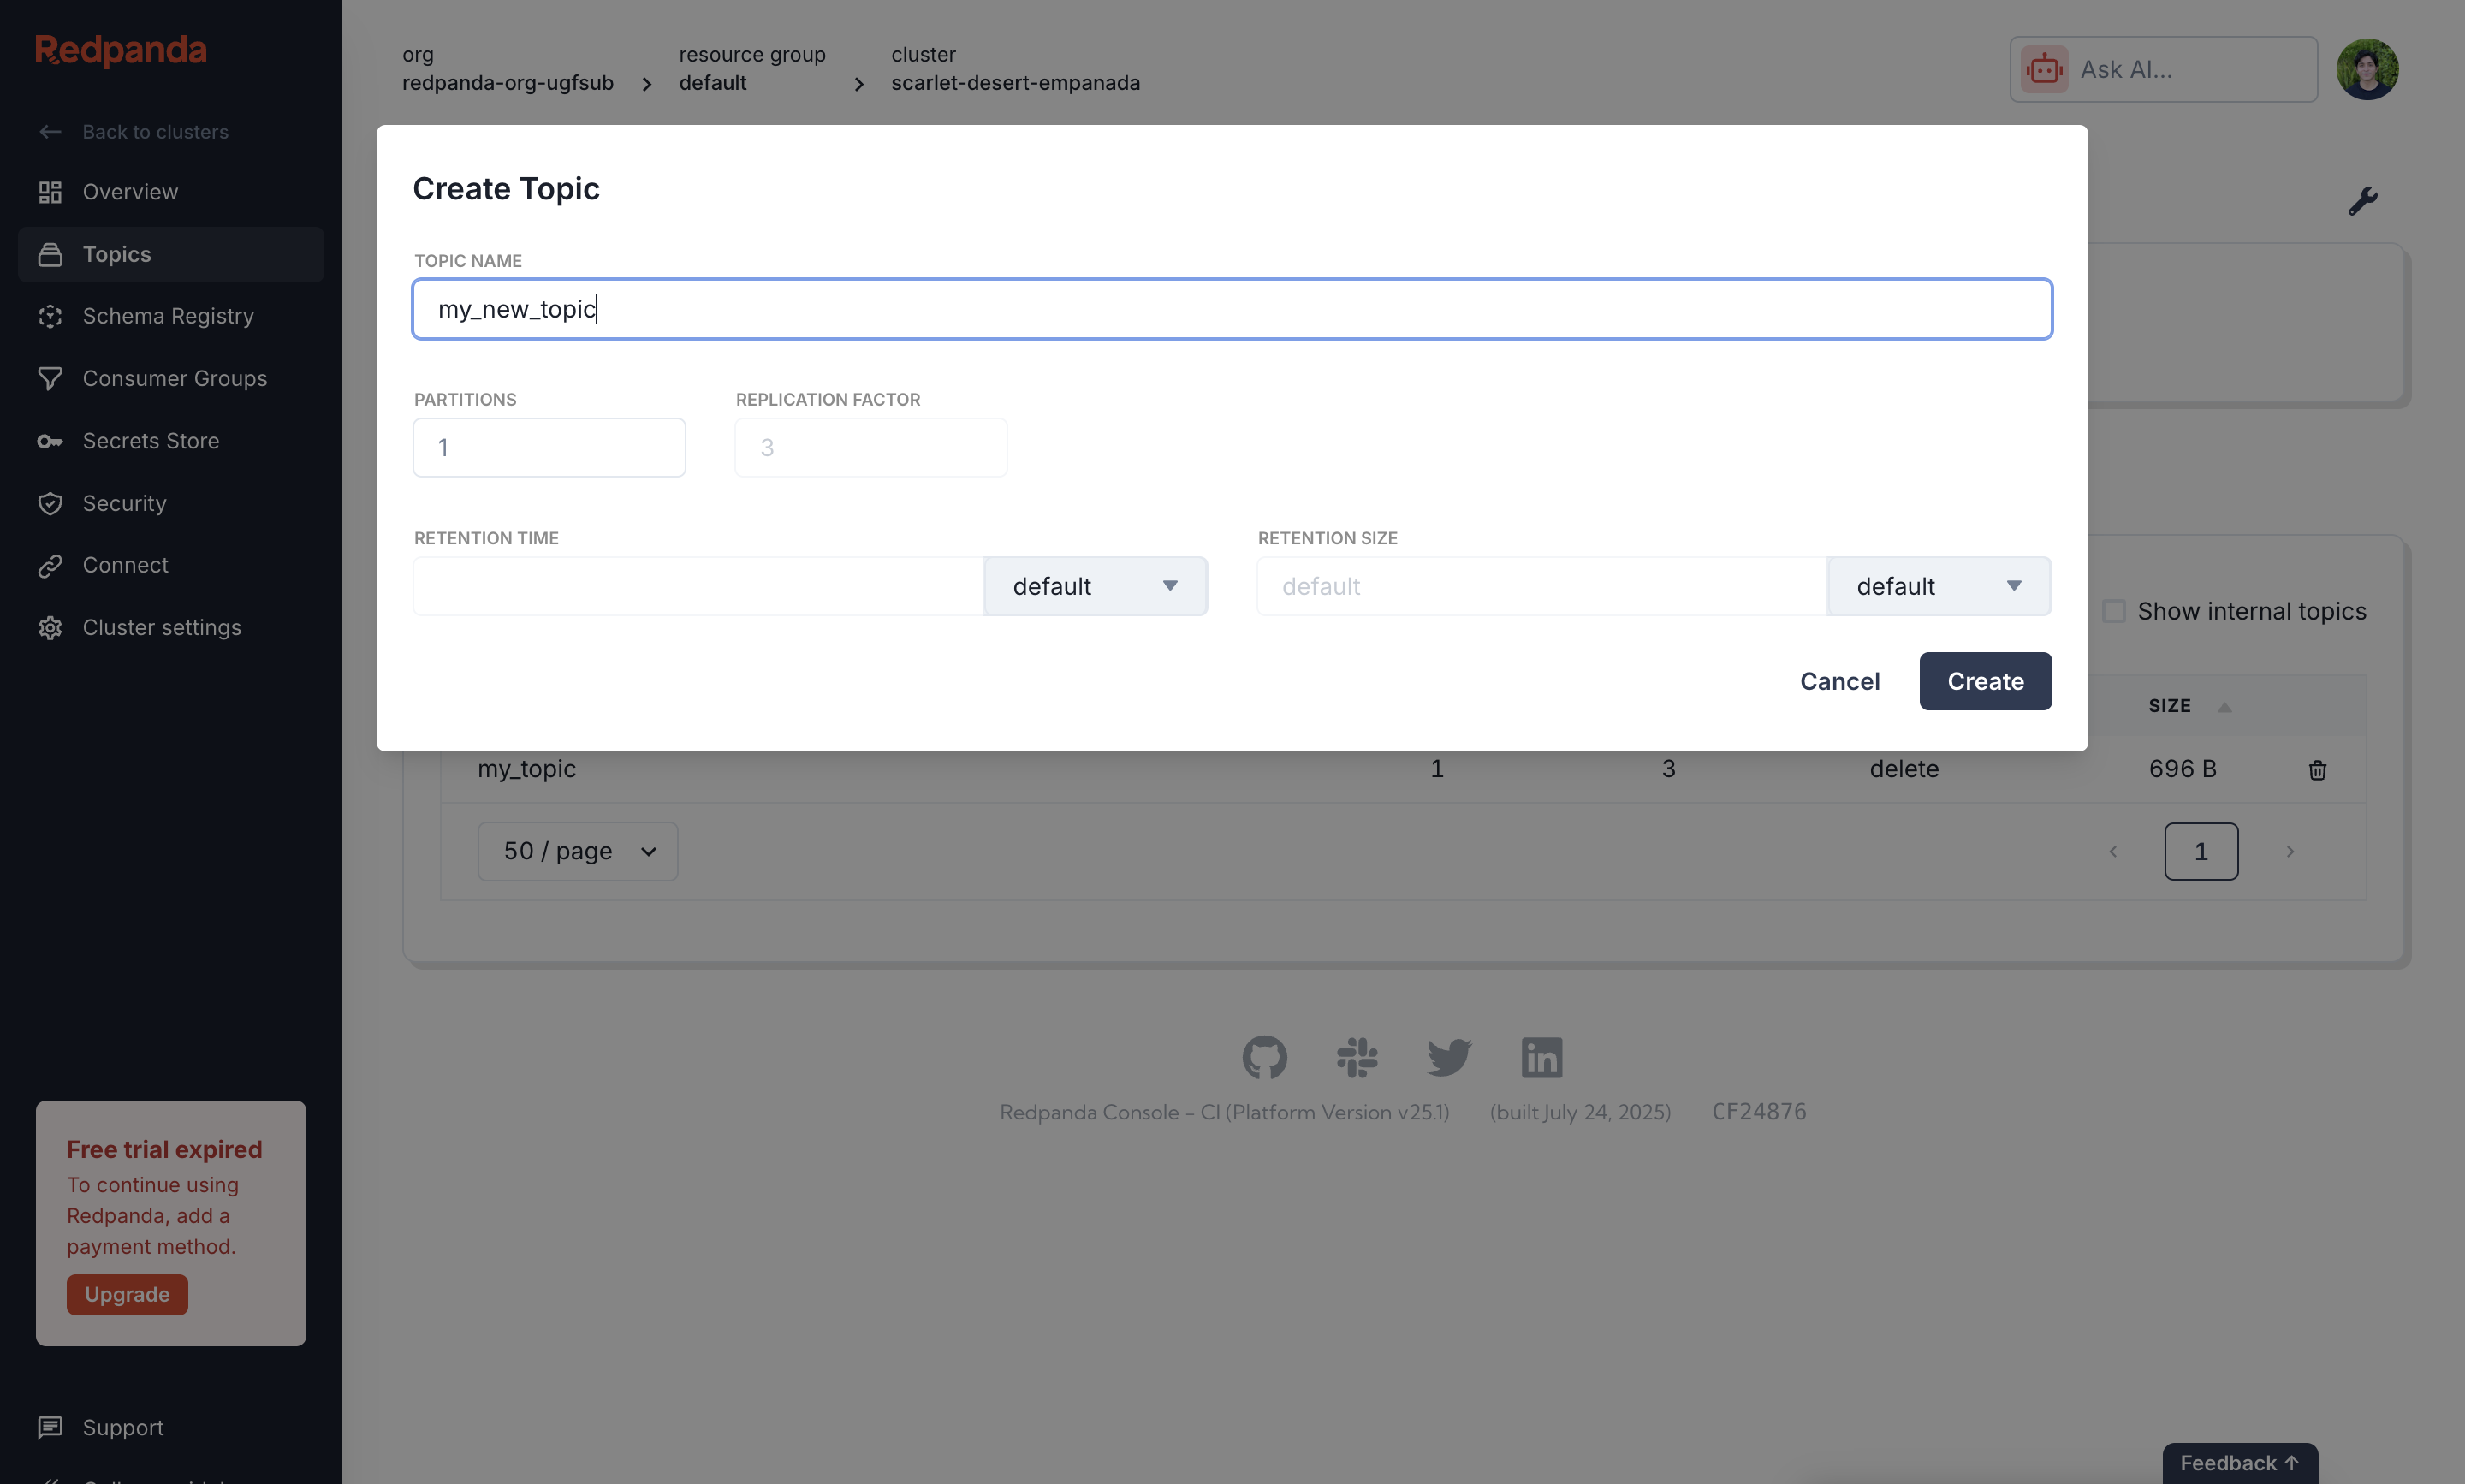
sim.toml file. For example, you might name it my_topic.Create a User and Set Permissions
Finally, create a user and grant it permissions to access your topic. Navigate to the Security section and create a new user, providing a Username and saving the generated Password. Then, go to the ACLs tab to create an ACL for that user. Configure it to 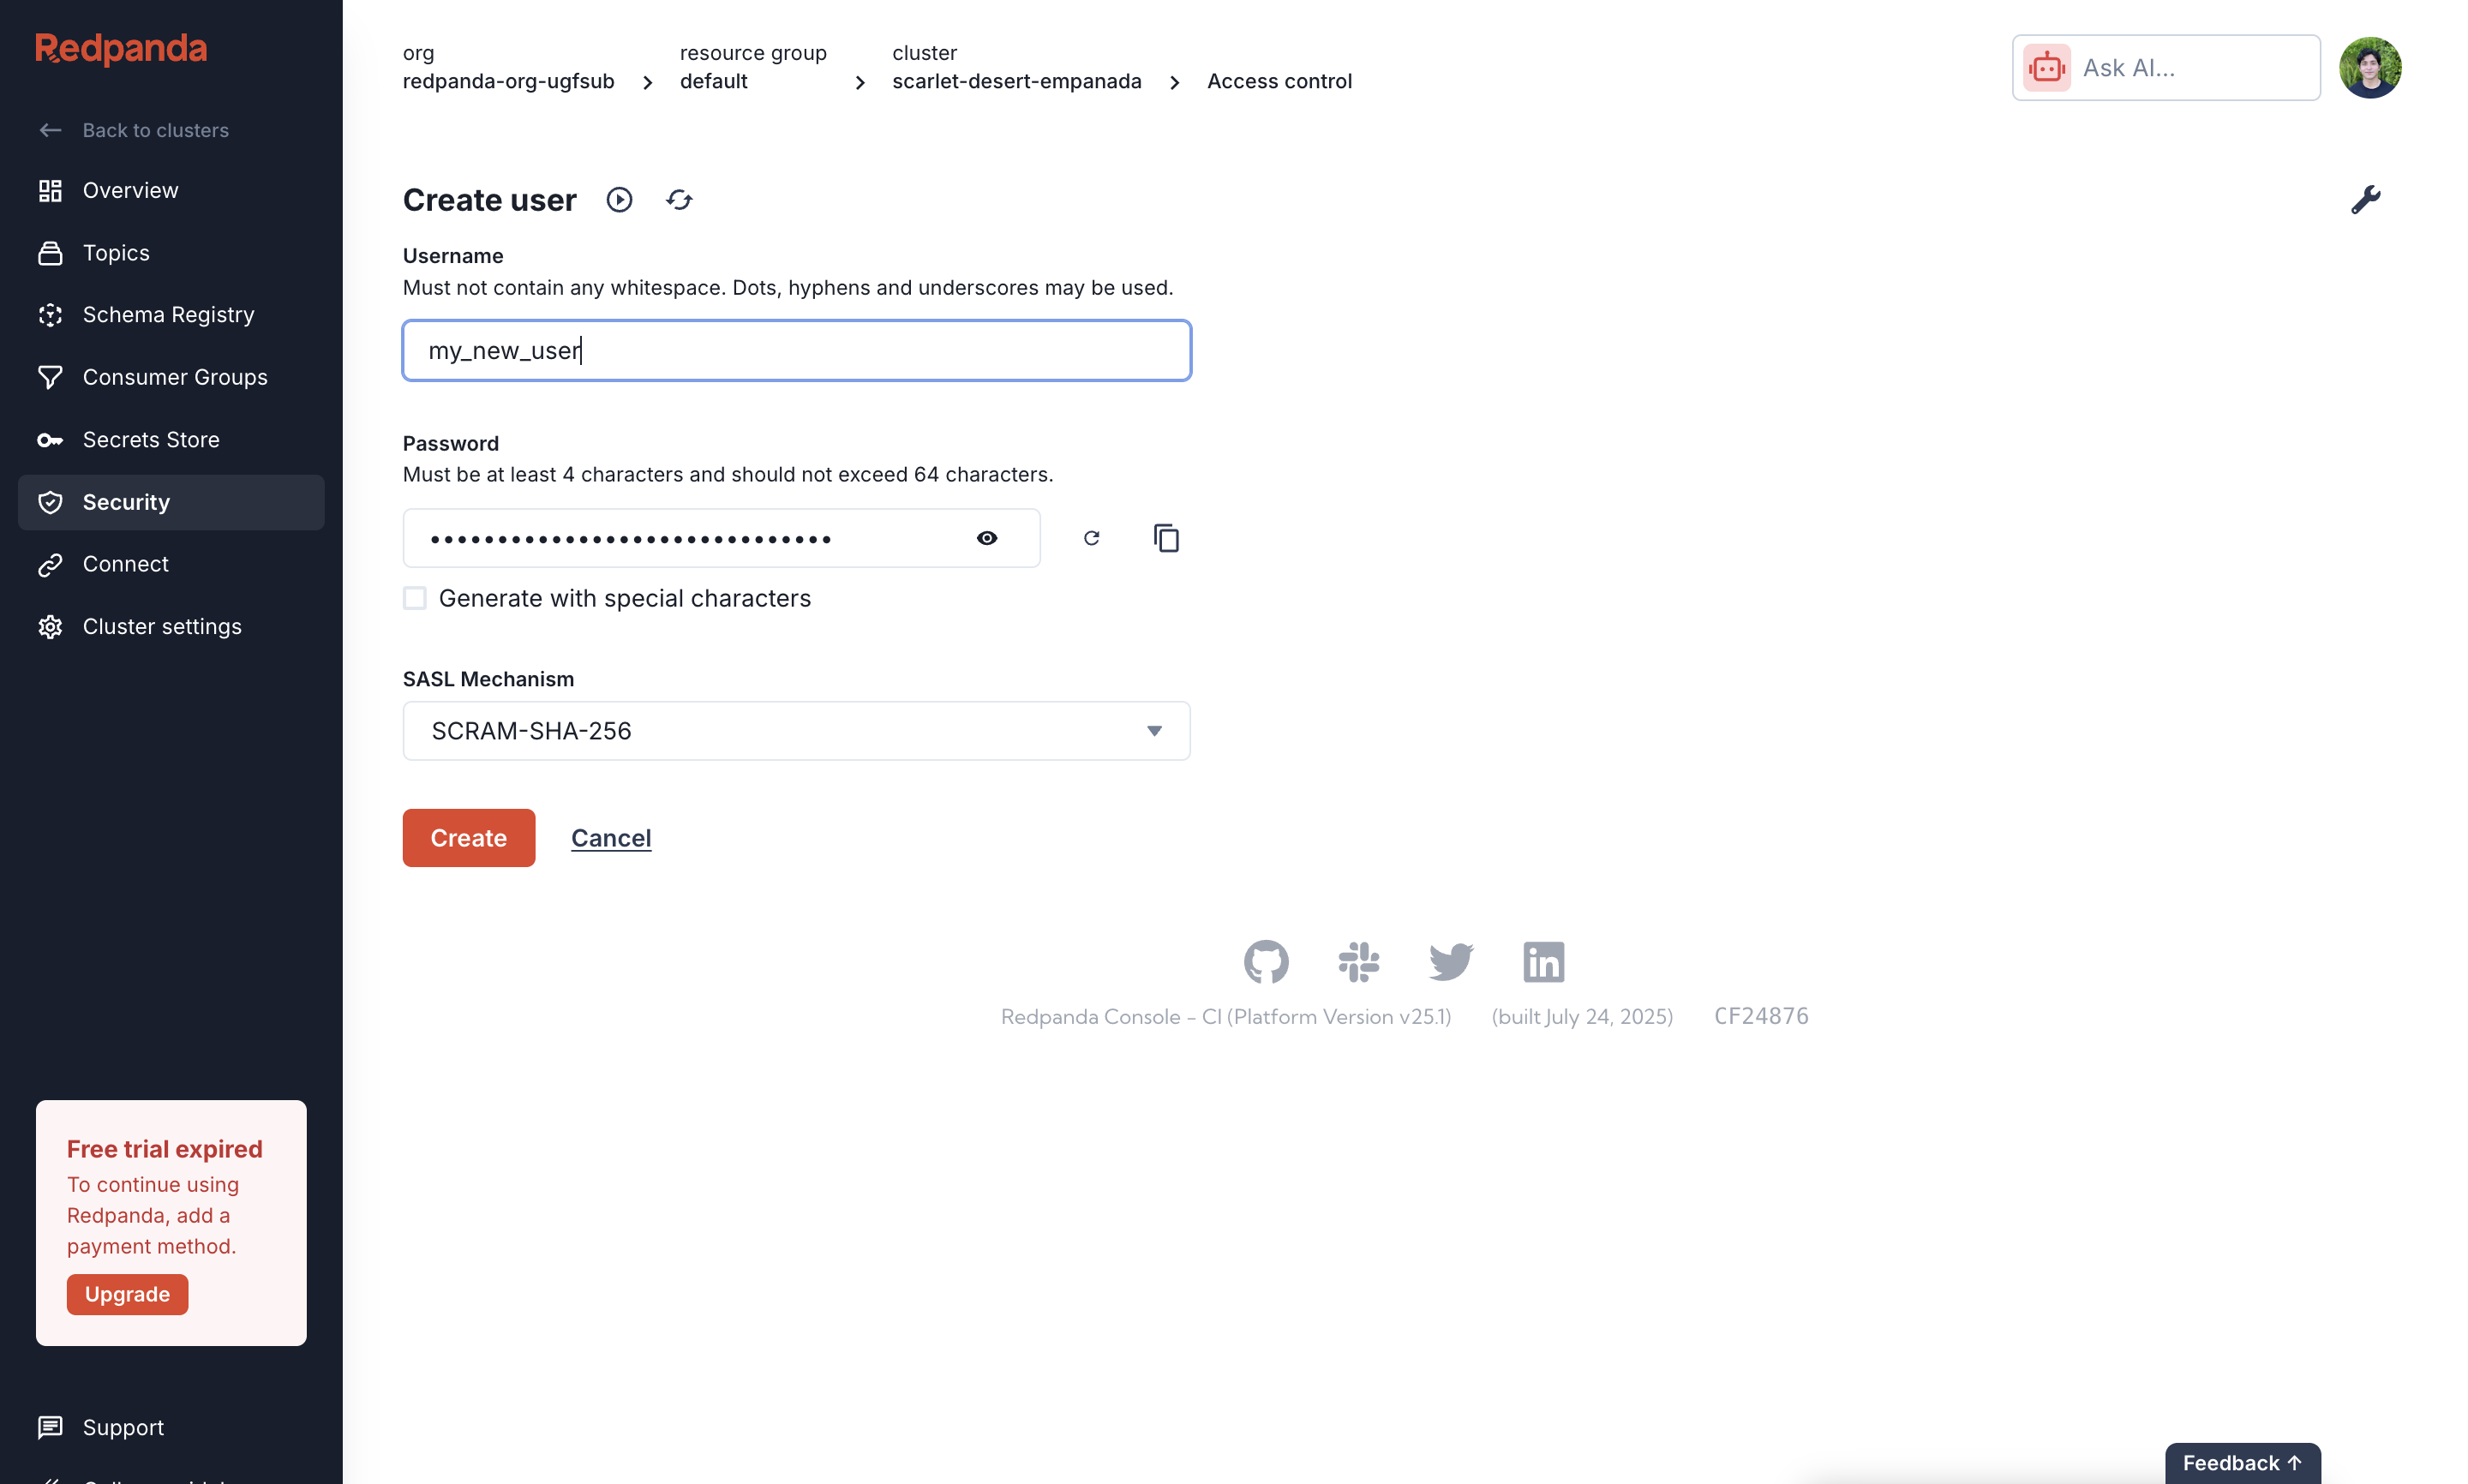
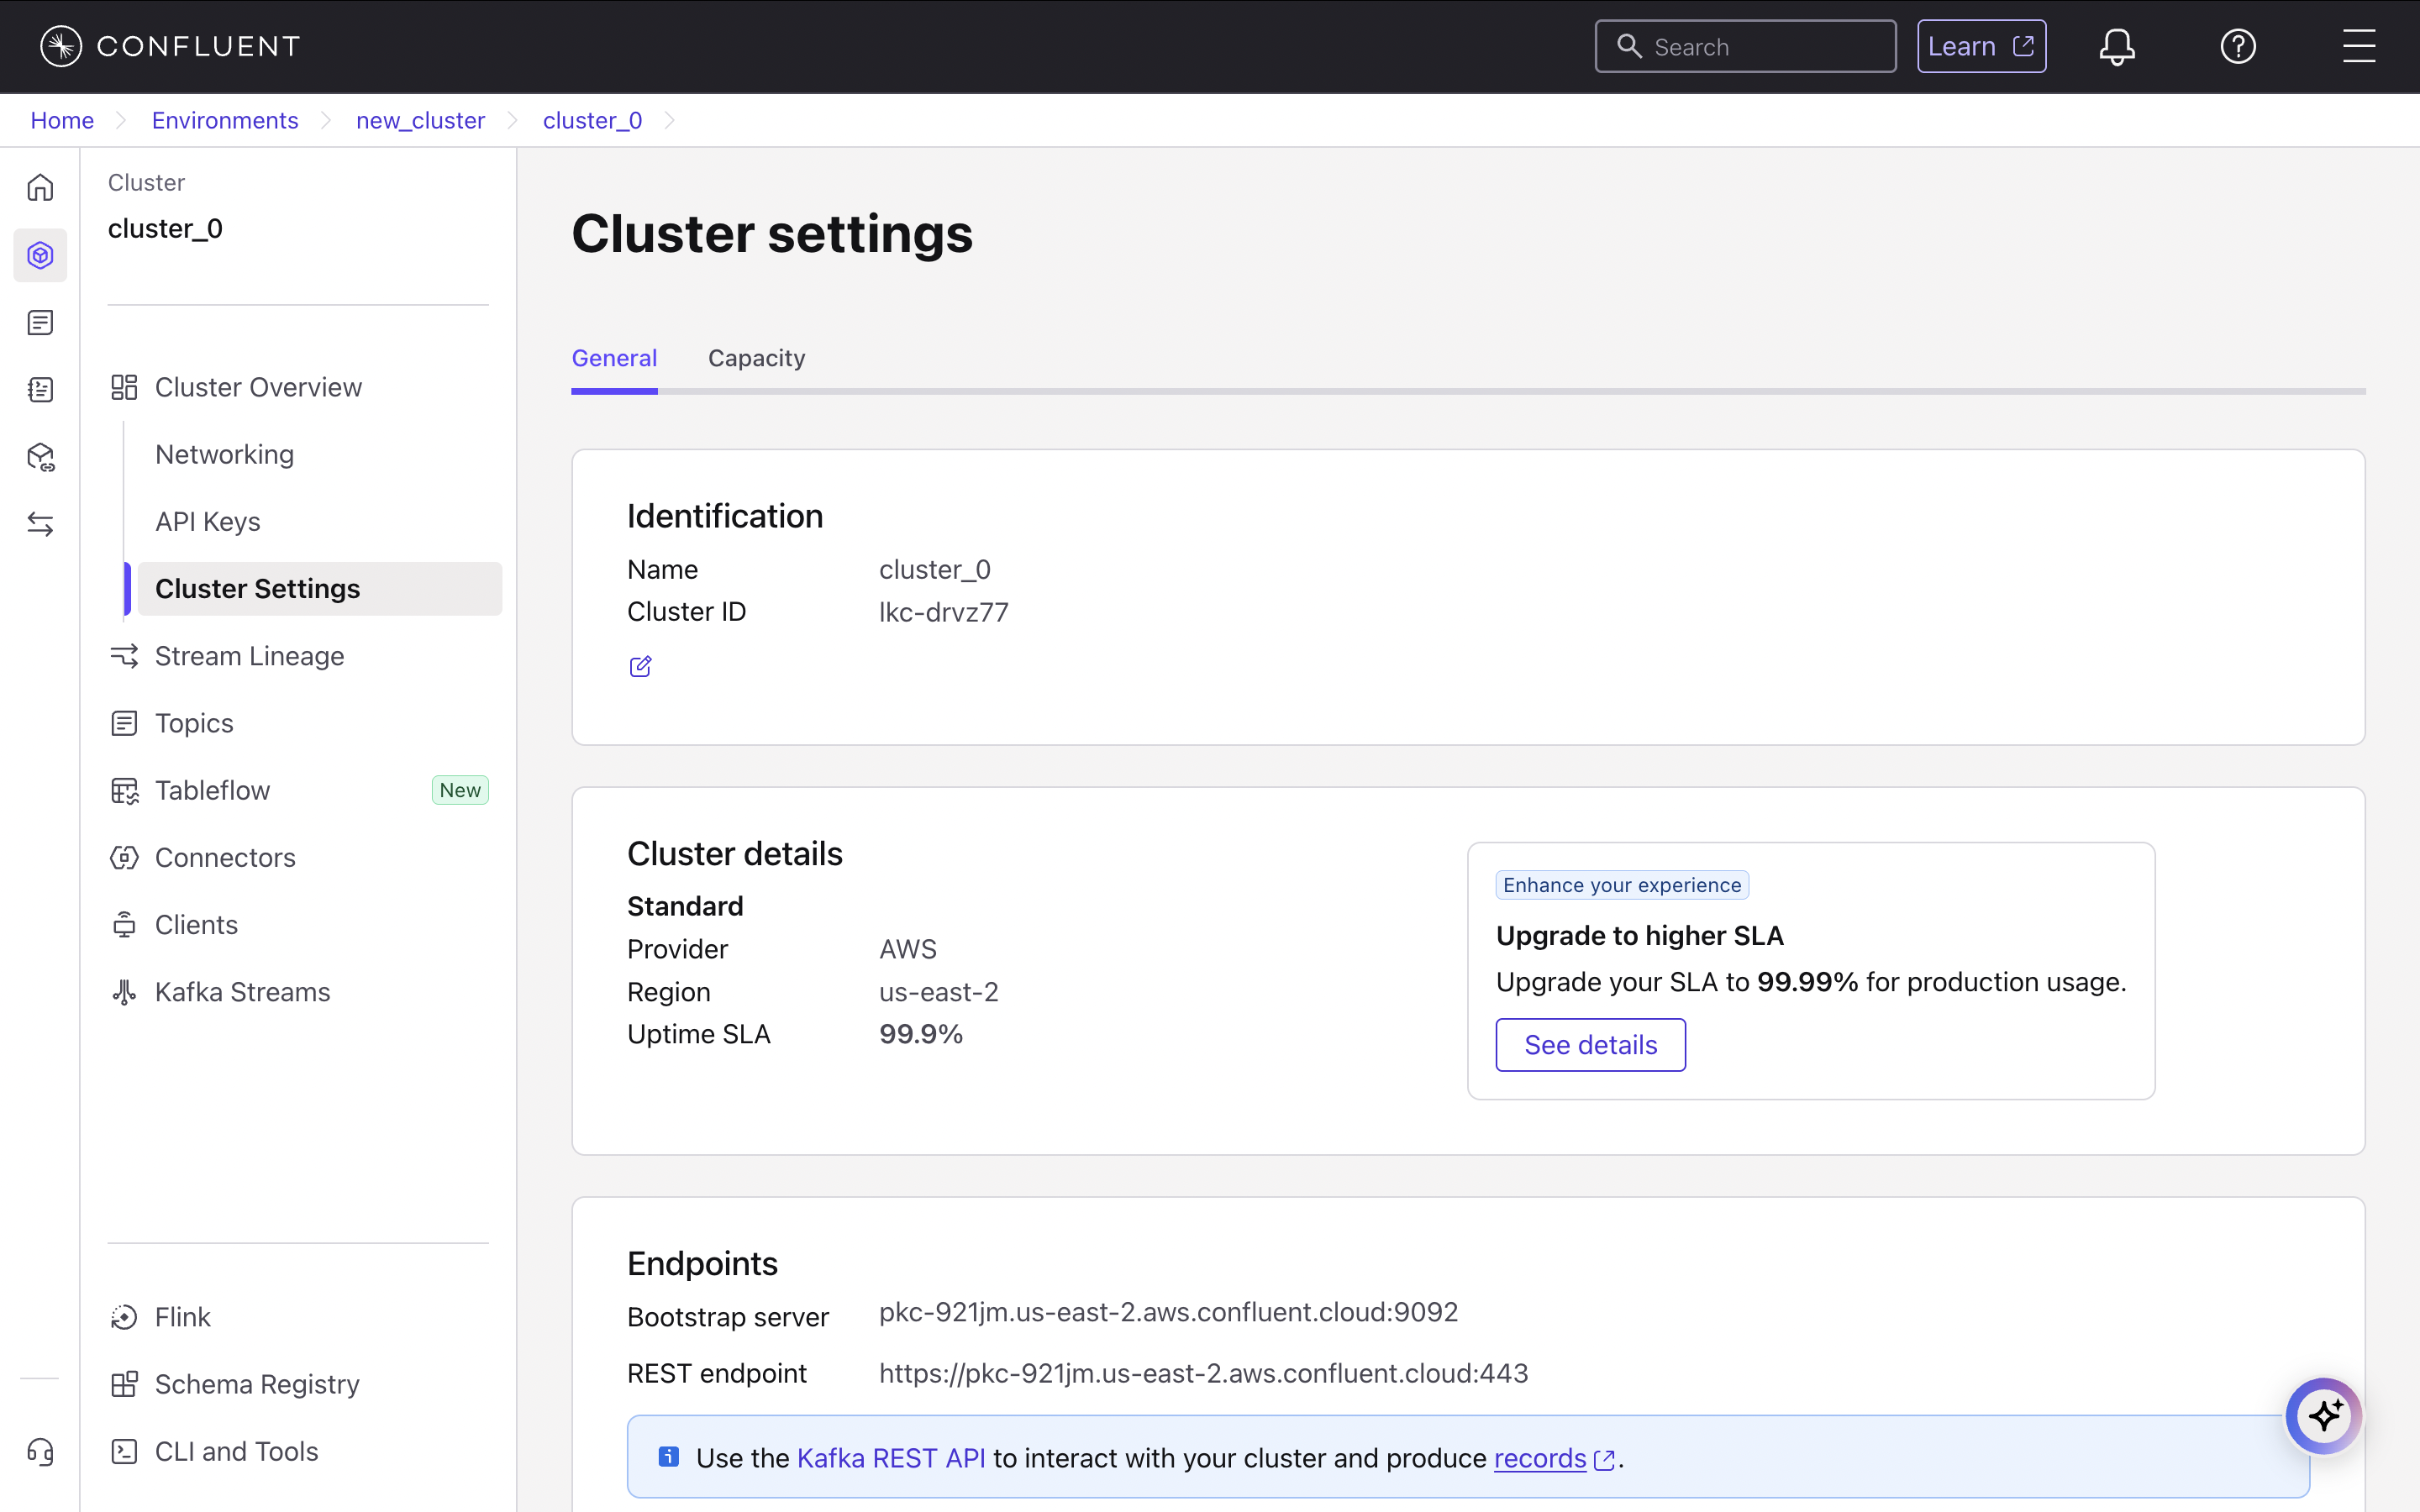
Allow all operations for your Prefixed topic name. The Username and Password you created correspond to the username and password fields in sim.toml.Set up Confluent Cloud
While thesim.toml configuration is standardized, setting up credentials and permissions can vary between different managed Kafka providers.
When configuring your
sim.toml file for a Confluent Cloud cluster, you must use the following settings:sasl_mechanism: Set this to"PLAIN".username: Use the API Key generated from the Confluent Cloud dashboard.password: Use the API Secret associated with that key.
Create an Environment
First, create a new cloud environment to house your cluster. In the Confluent Cloud dashboard, navigate to Environments and click Add cloud environment. Provide an Environment name such as
new_cluster, select the Essentials Stream Governance package, and click Create.Create a Kafka Cluster
Next, launch a new Kafka cluster within your environment. On the “Create cluster” page, select the
Standard cluster type, give it a Cluster name such as cluster_0, choose a cloud provider and region, then click Launch cluster.Create a Kafka Topic
Now you will need to create a topic where your listener events will be sent. From your cluster’s navigation menu, select Topics, then click Create topic. Enter a Topic name, which is the name you will use in your 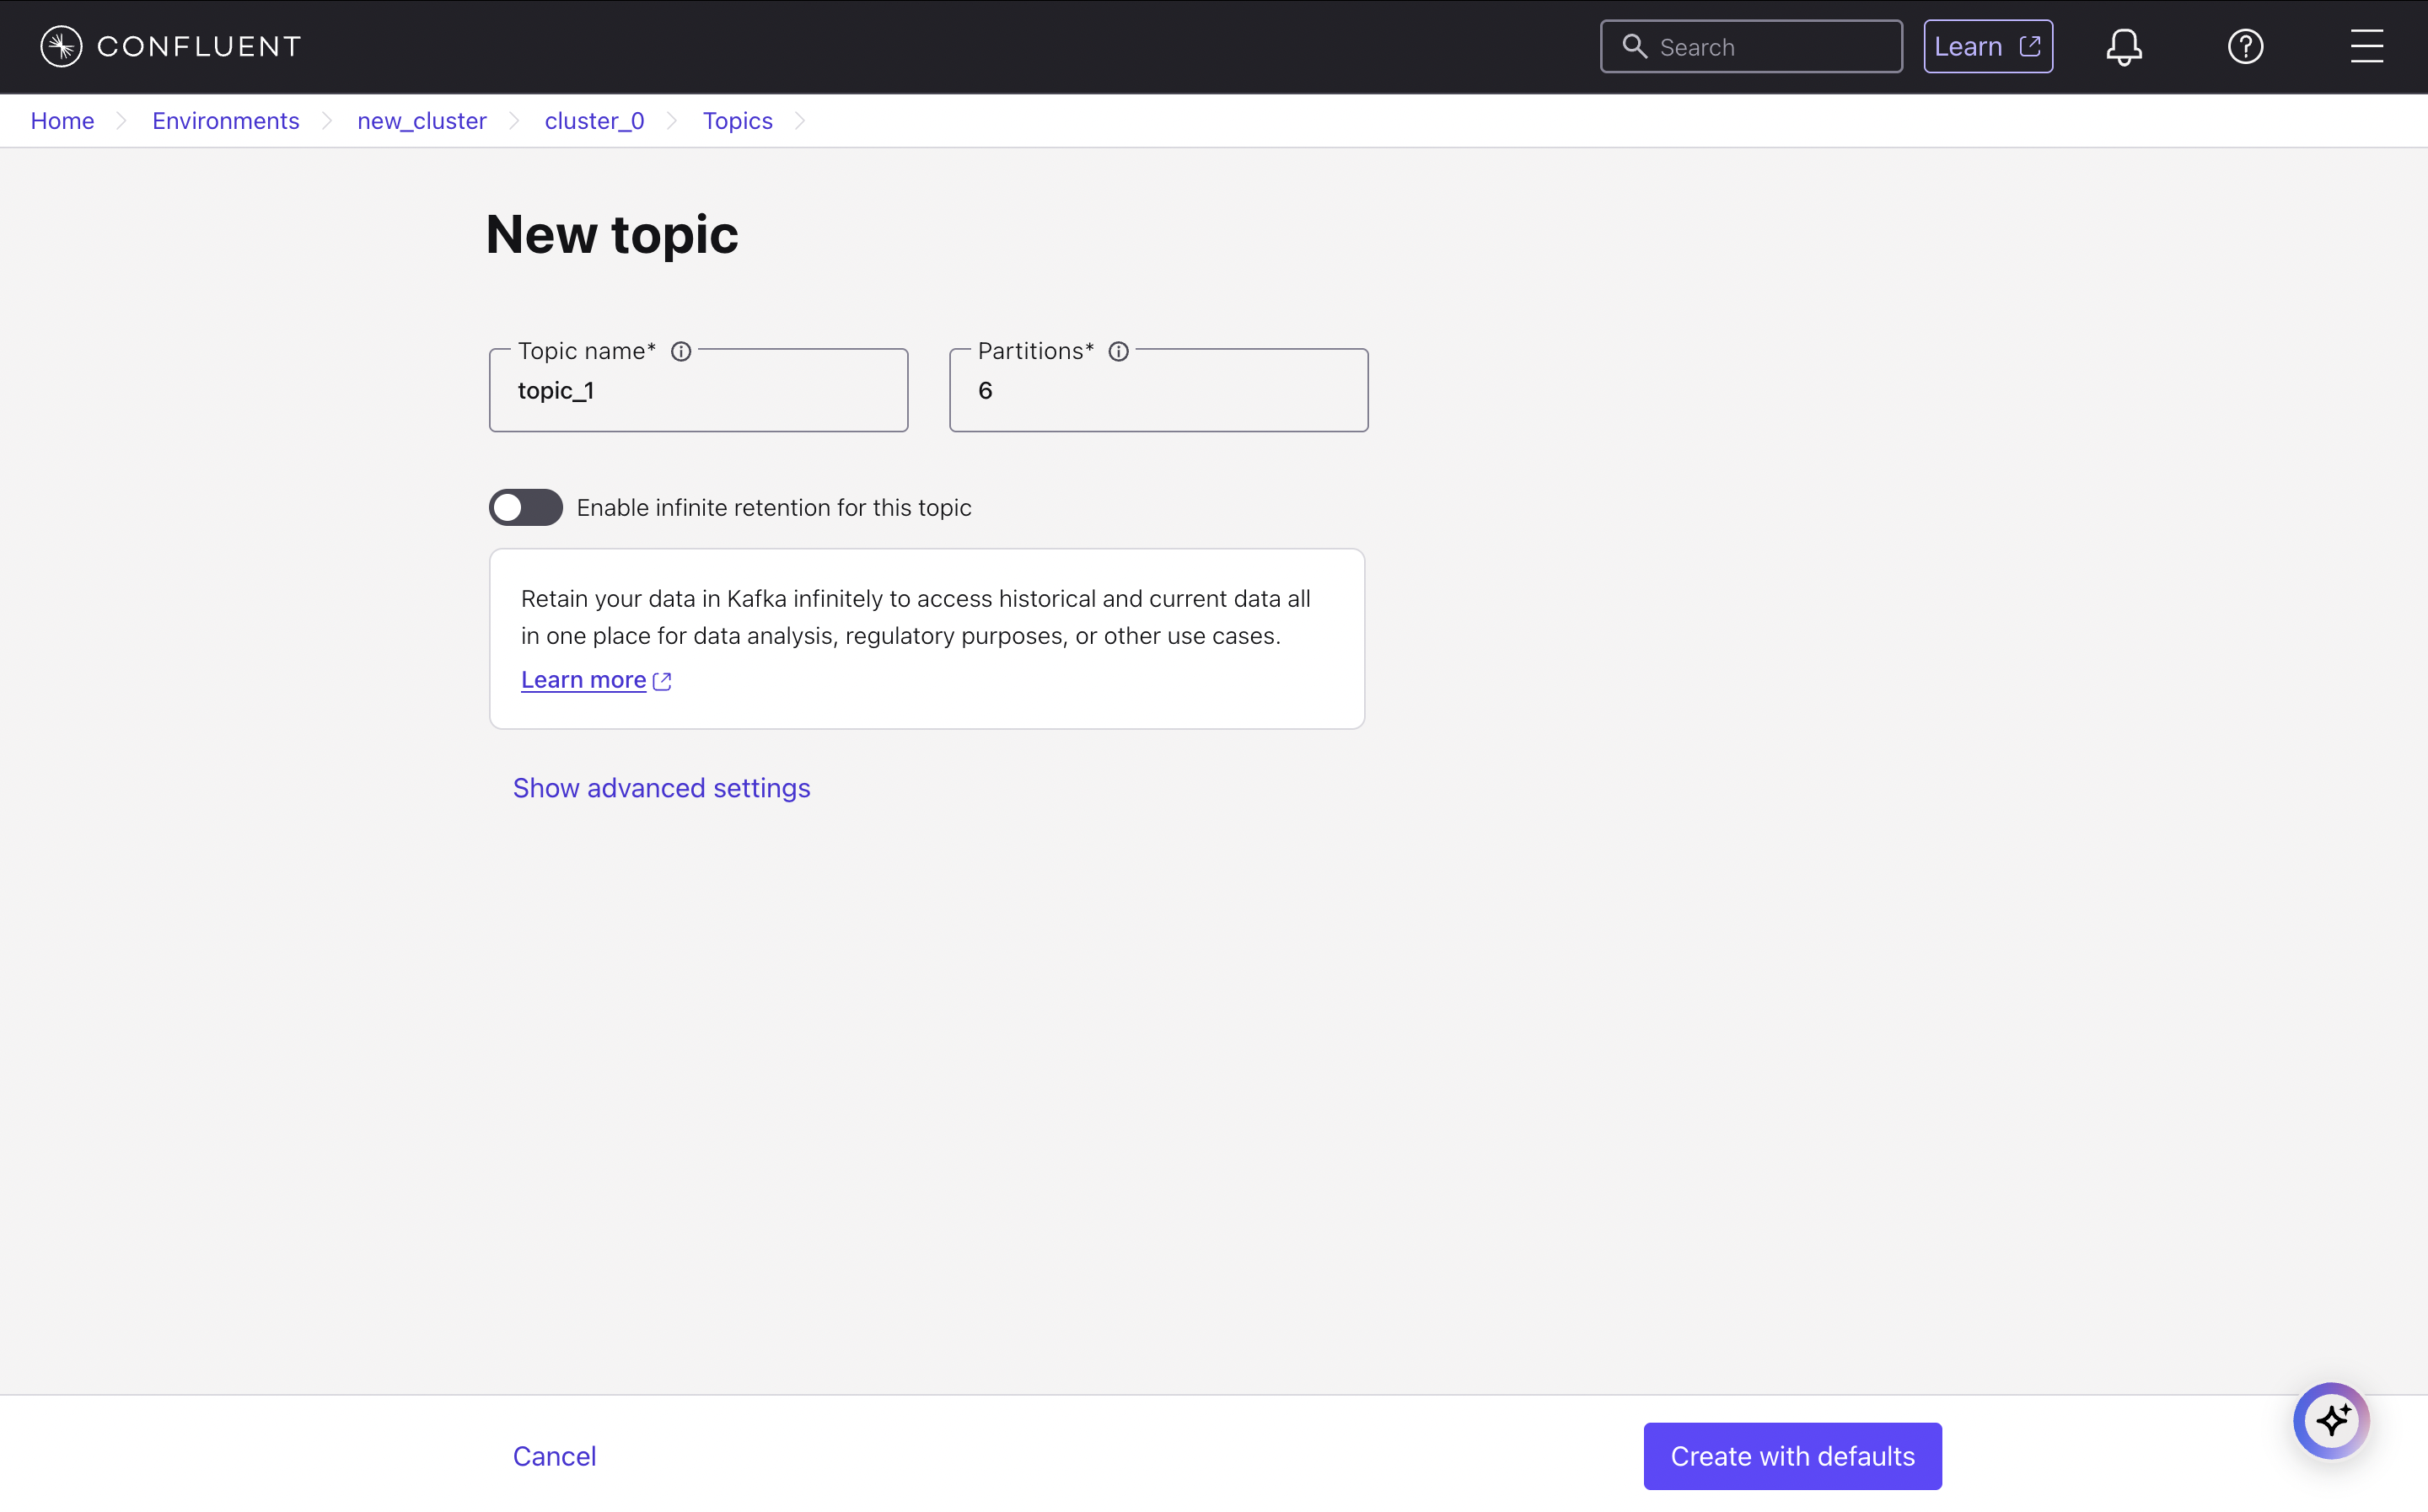
sim.toml file, and click Create with defaults. For example, you might name it topic_0.Create an API Key and Set Permissions
To allow Sim IDX to connect, generate an API key and grant it the necessary permissions. From the cluster’s navigation menu, select API Keys, then click Create key. Choose to create a new Service account and give it a descriptive name like 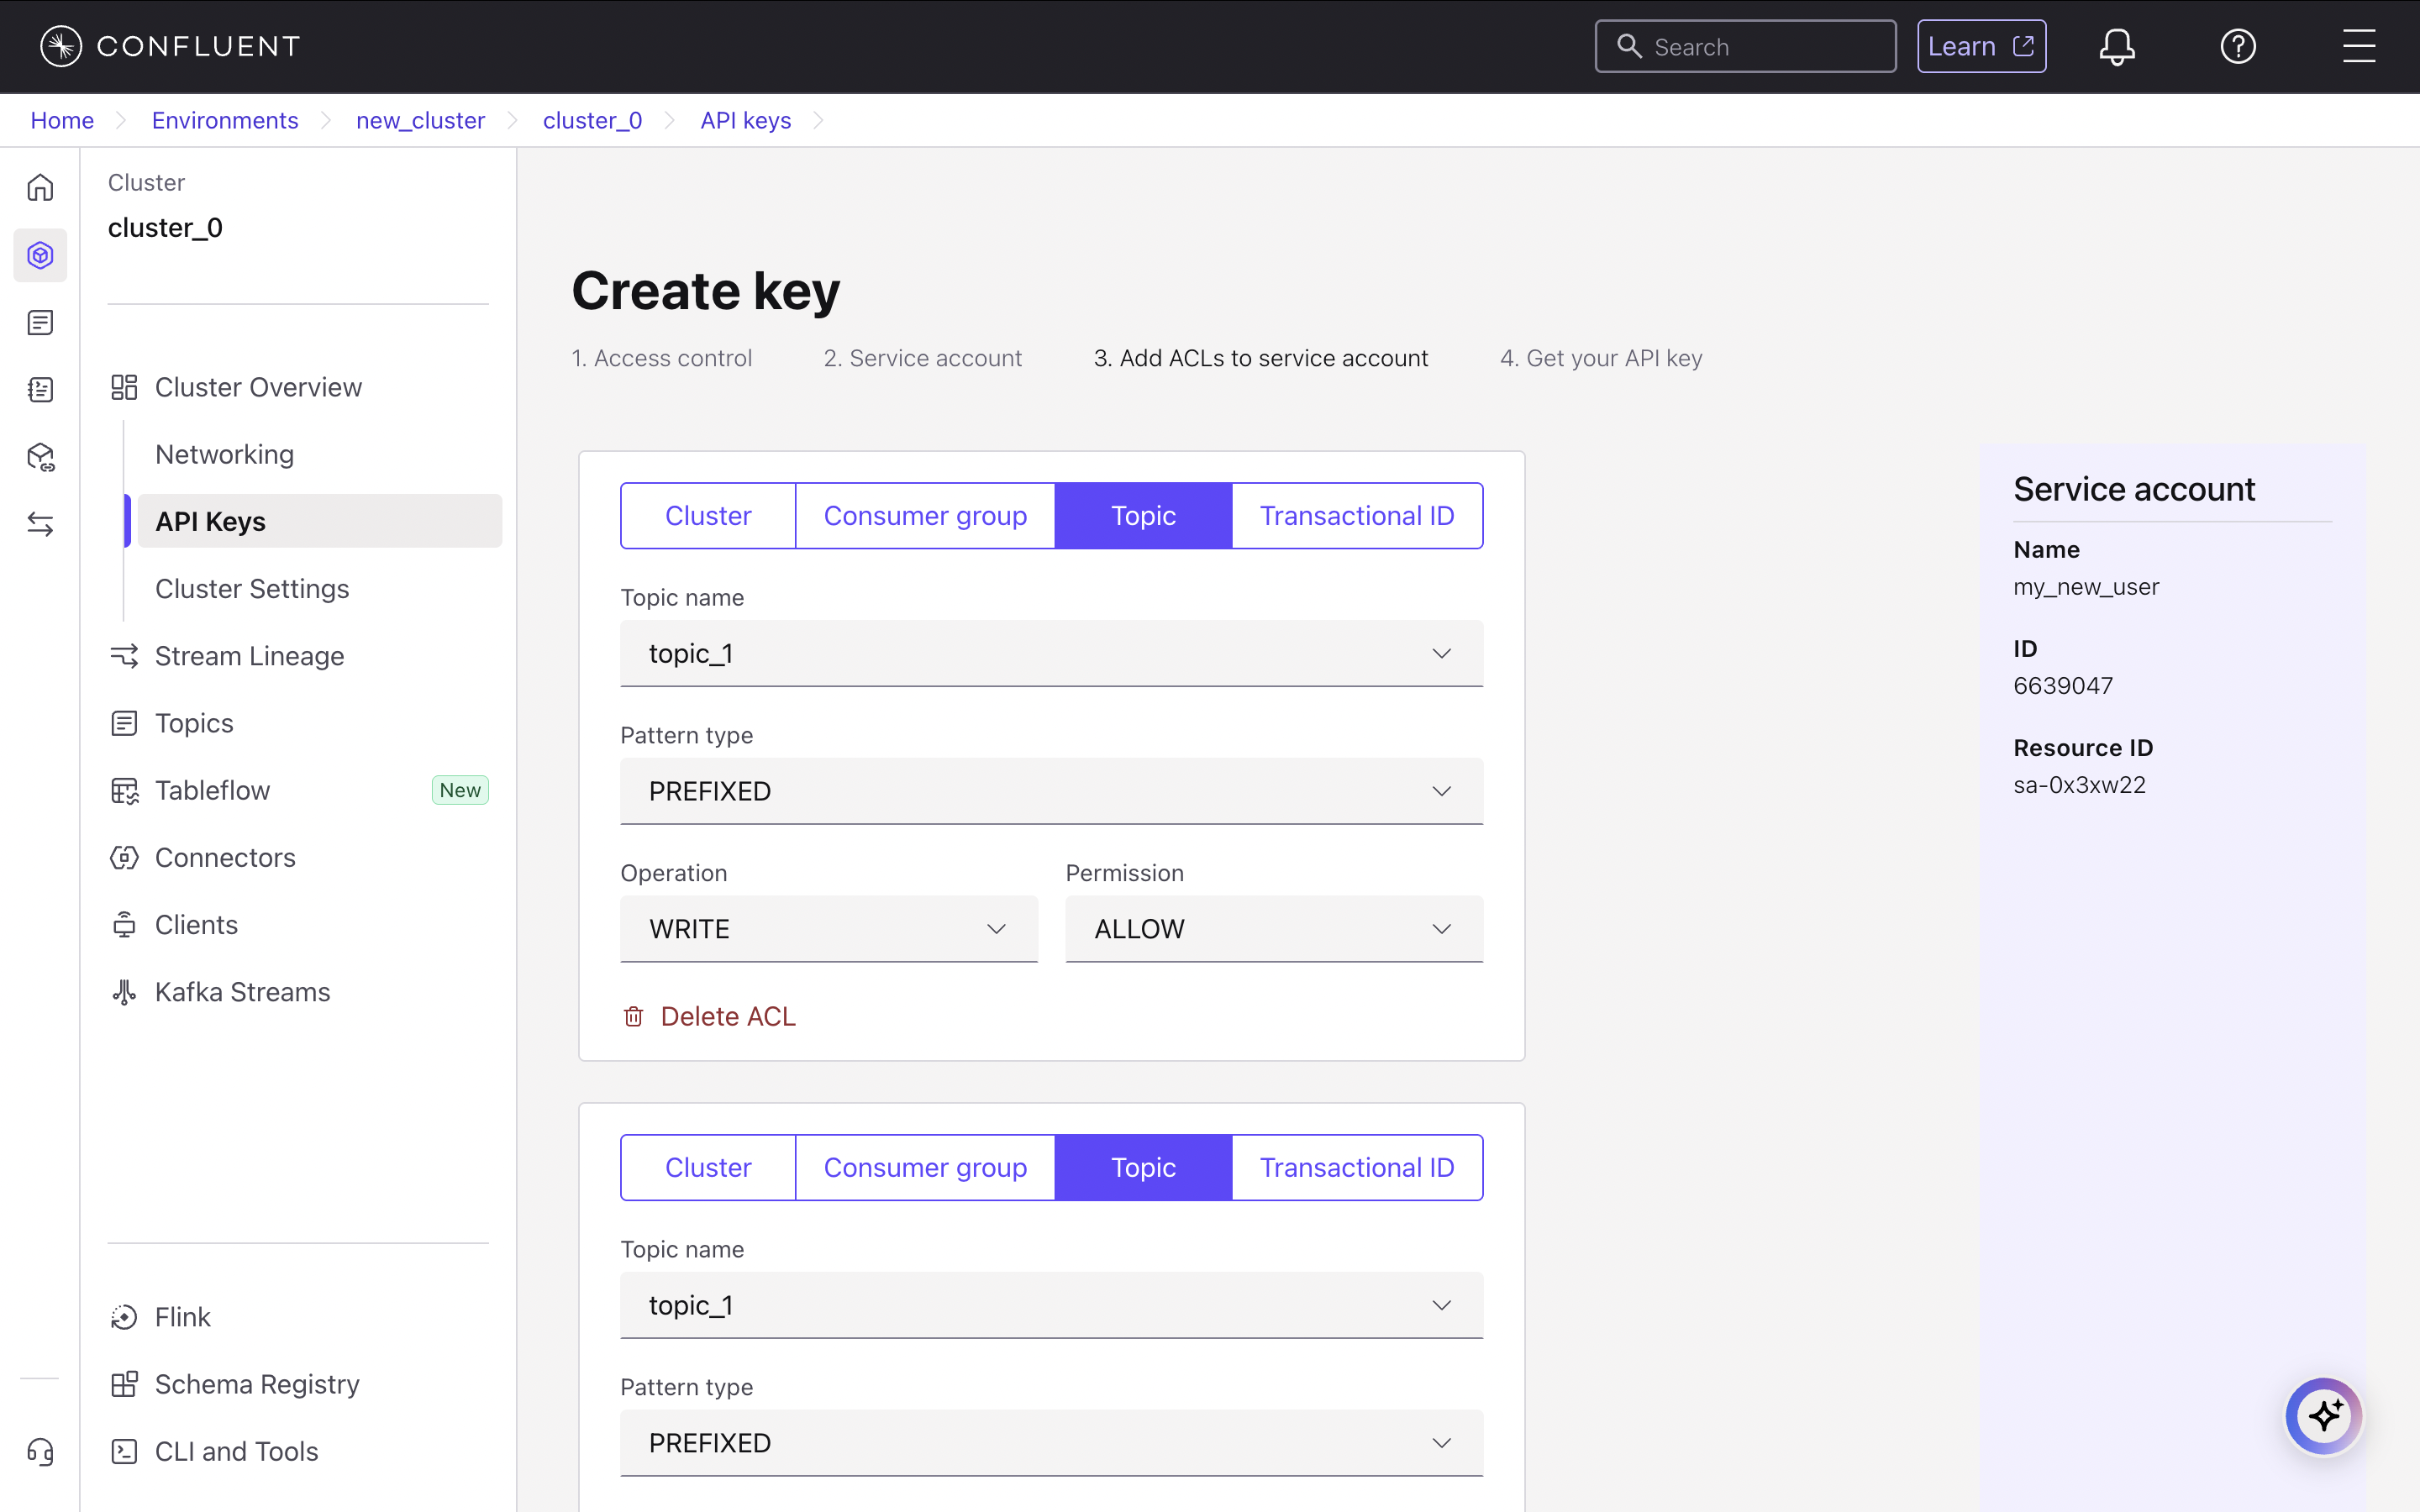
my_account. You must then add an Access Control List (ACL) to grant WRITE and CREATE permissions for your PREFIXED topic (topic_0).Save Your Credentials
After creation, Confluent will display your API Key and Secret. Copy and save these credentials securely, as the Secret will not be shown again. The Key corresponds to the 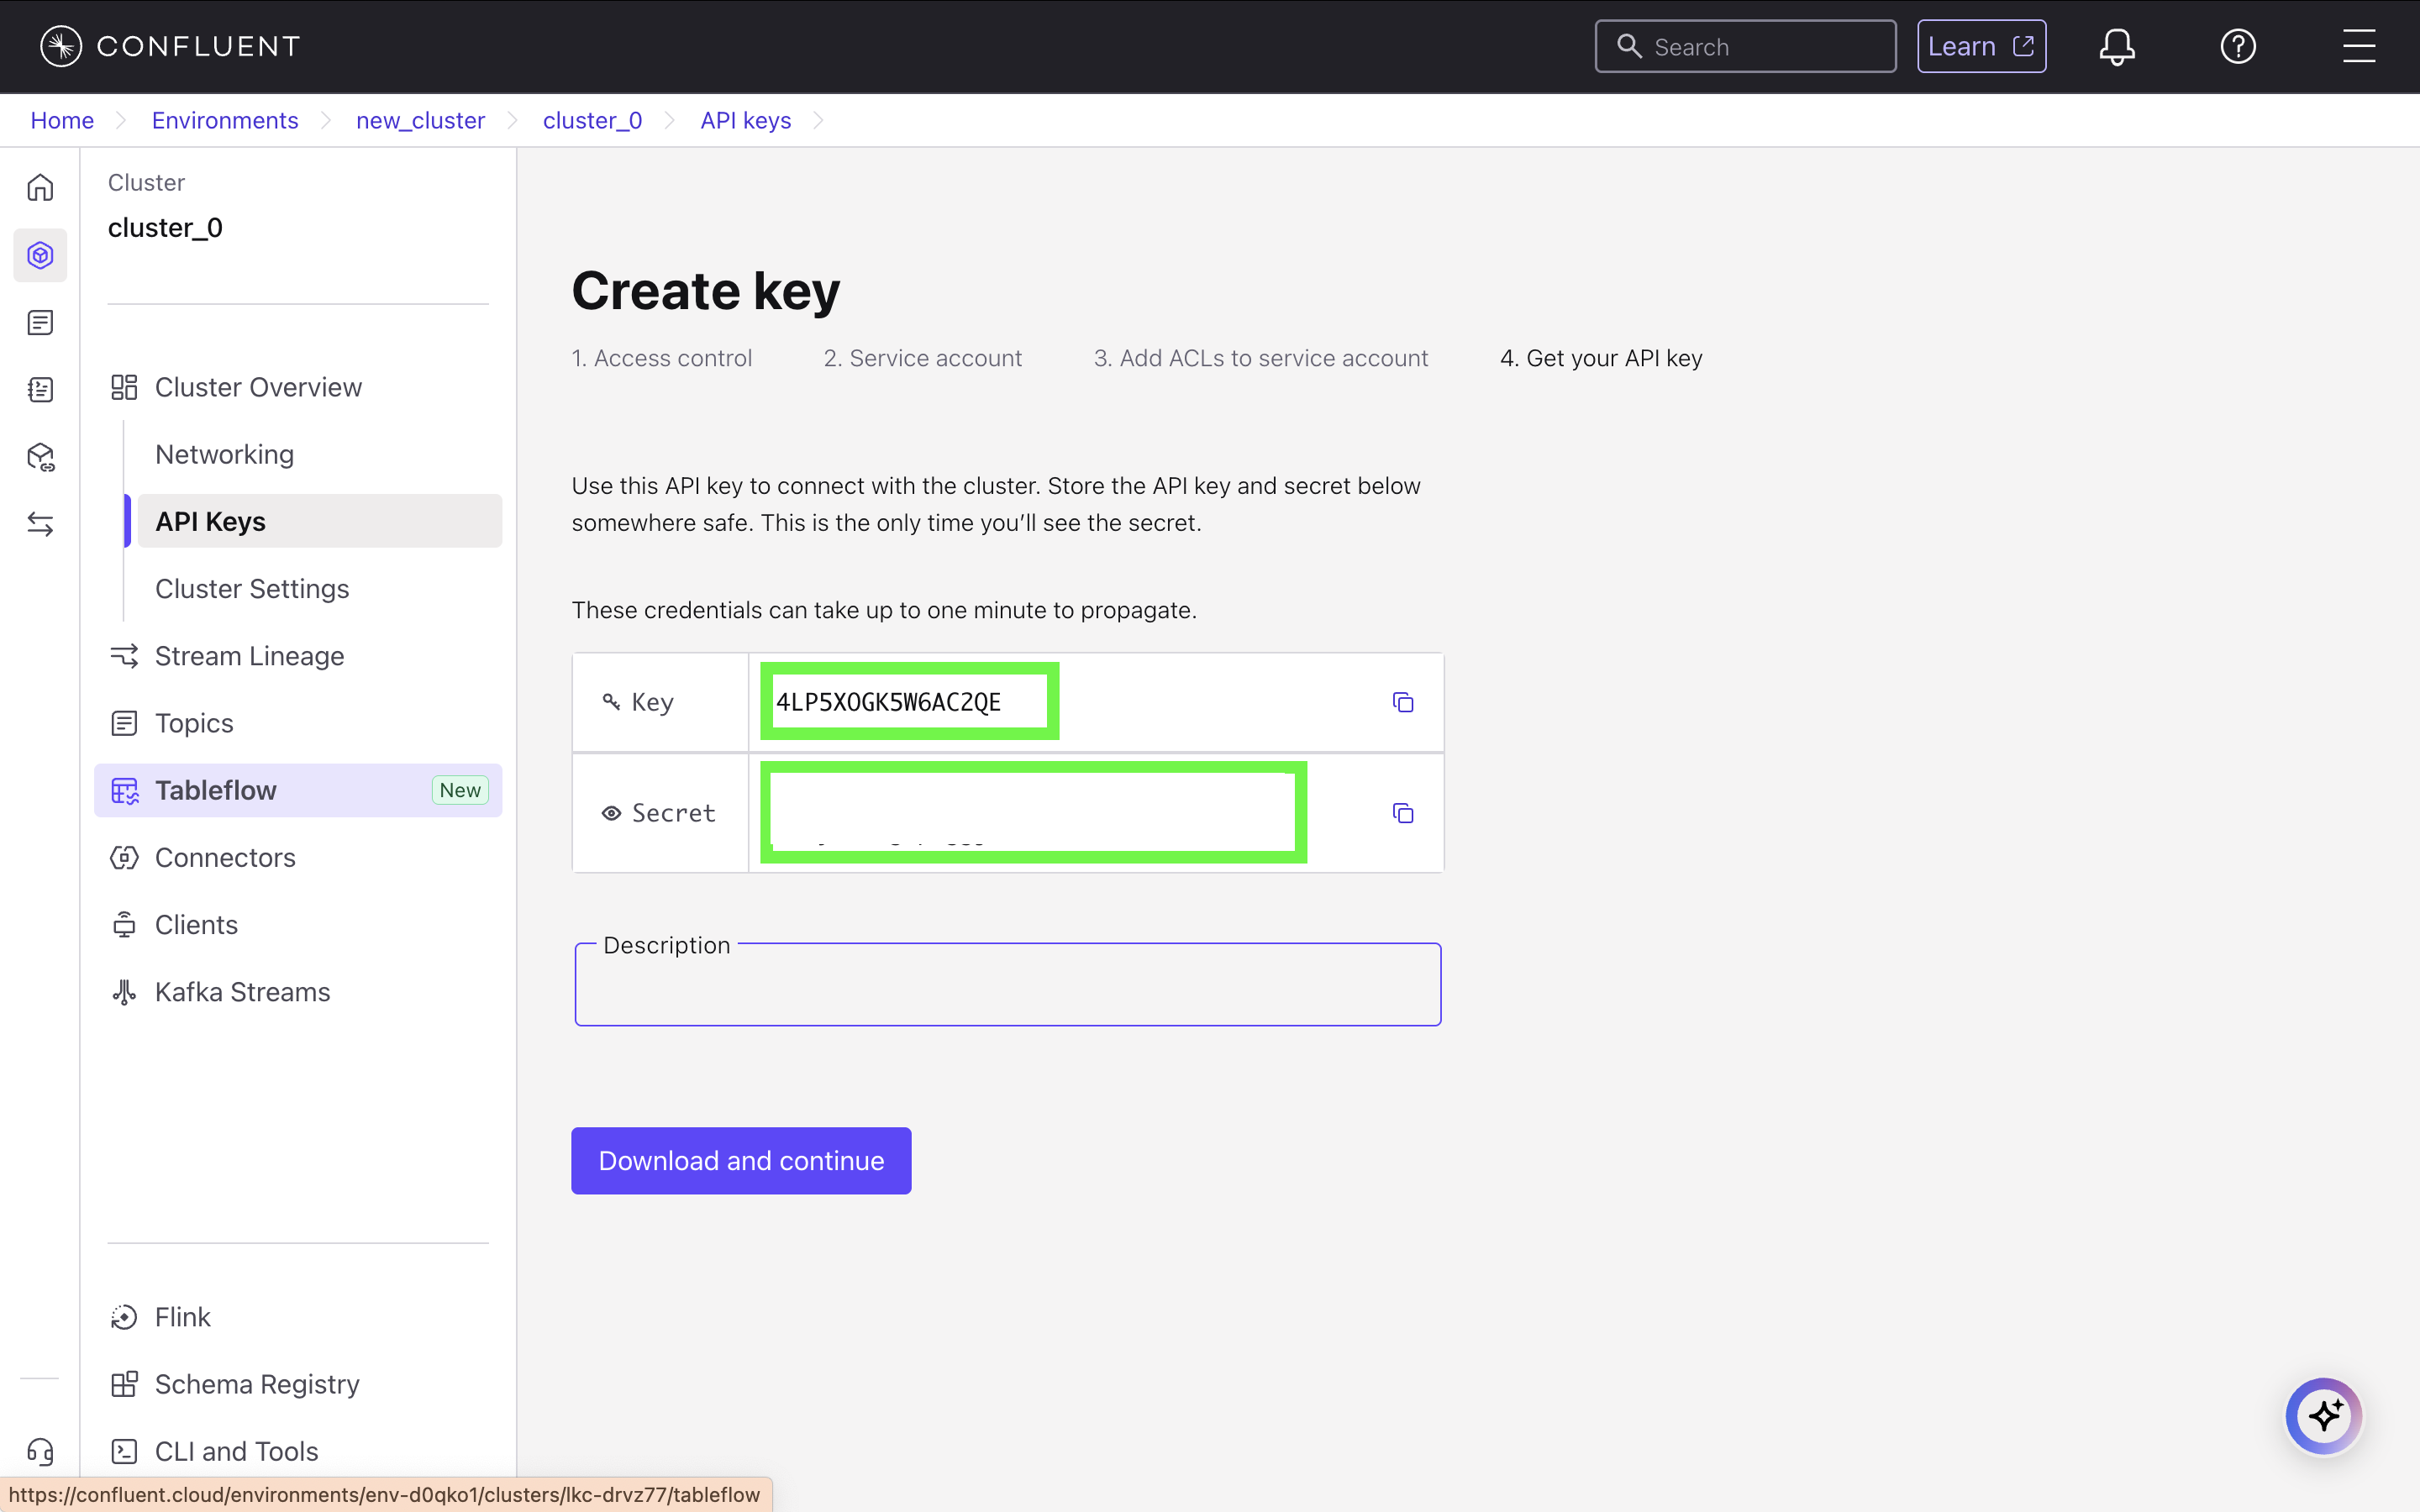
username field and the Secret corresponds to the password field in your sim.toml file.