Infrastructure & Scalability
Your API runs on Cloudflare Workers with the Hono framework. Anything you can do in Hono will also work here. Your data is stored, by default in a Neon Postgres database accessed through Cloudflare Hyperdrive.As an alternative, you can also set up Kafka sinks to stream your indexed blockchain data in real-time to external data sinks like Confluent Cloud or Redpanda Cloud, in addition to the default Postgres database.
The setup scales with your traffic, but there are sensible platform limits. If you anticipate sustained very high volume, please contact us.
Local Development Setup
Building APIs on Sim IDX follows a streamlined workflow. You develop locally, write endpoints to query your indexed data, and deploy with a simple git push. The boilerplate API in theapis/ directory gives you a starting point with common patterns for querying your indexed blockchain data and serving it through HTTP endpoints.
Before deploying, you can run and test your API locally.
Set Up Environment Variable
Create a file named
.dev.vars in the apis/ directory. Add the database connection string, which you can find on the App Page after deploying your app for the first time.Understand the API Code
The boilerplate API inapis/src/index.ts is a TypeScript application that runs on Cloudflare Workers. It connects to your indexed database and exposes HTTP endpoints to query your data. Let’s understand how this works.
Framework Setup
The API uses the@duneanalytics/sim-idx helper library, which wraps Hono and Drizzle to simplify setup:
Environment Configuration
@duneanalytics/sim-idx automatically handles credentials in production. For local development, place DB_CONNECTION_STRING in .dev.vars as shown above if you need to supply your own connection string.
Application Instance
Create the web application with a single call:Database Connection Management
Instead of managing your own connection pool, calldb.client(c) inside a request handler to reuse the shared Drizzle client:
Add a New Endpoint
Let’s build three endpoints to serve our indexed data:/api/pools to get recent Uniswap V3 pools, /api/owner-changed to get recent owner changed events, and /api/pools/count to get the total number of pools.
Creating the Pools Endpoint
Create an endpoint to fetch the 10 most recent Uniswap V3 pools. This endpoint queries thepool_created table from your listener.
LIMIT 10 clause keeps the response small. In a production environment, consider adding pagination and filtering.
Adding the Owner Changed Endpoint
Before continuing, make sure you’ve added support for the Running
OwnerChanged event in your listener contract by following the “Triggering more functions and events” section of the Listener guide and then running:sim build regenerates apis/src/db/schema/Listener.ts with a new ownerChanged table binding that we import below.owner_changed table.
Creating the Pool Count Endpoint
Finally, add an endpoint to get the total number of pools. This is useful for pagination and analytics.Testing Your Endpoints
After adding all three endpoints, you can test them locally athttp://localhost:8787/api/pools, http://localhost:8787/api/owner-changed, and http://localhost:8787/api/pools/count.
Authenticate API Endpoints
Sim IDX provides built-in authentication middleware that integrates seamlessly with your app and the platform. When deployed to production, the authentication middleware requires a valid Sim IDX App Endpoints API key to be passed with each request. Sim’s infrastructure validates the key and, if successful, allows the request to proceed. Unauthenticated requests return a401 Unauthorized error.
During local development, the authentication middleware automatically disables authentication checks when your API is running locally. This occurs when NODE_ENV is not production. This allows you to test endpoints without managing keys.
Create a Sim IDX App Endpoints API Key
Your API will need a Sim IDX App Endpoints API key to access your authenticated endpoints. You can generate a new key from the Sim dashboard.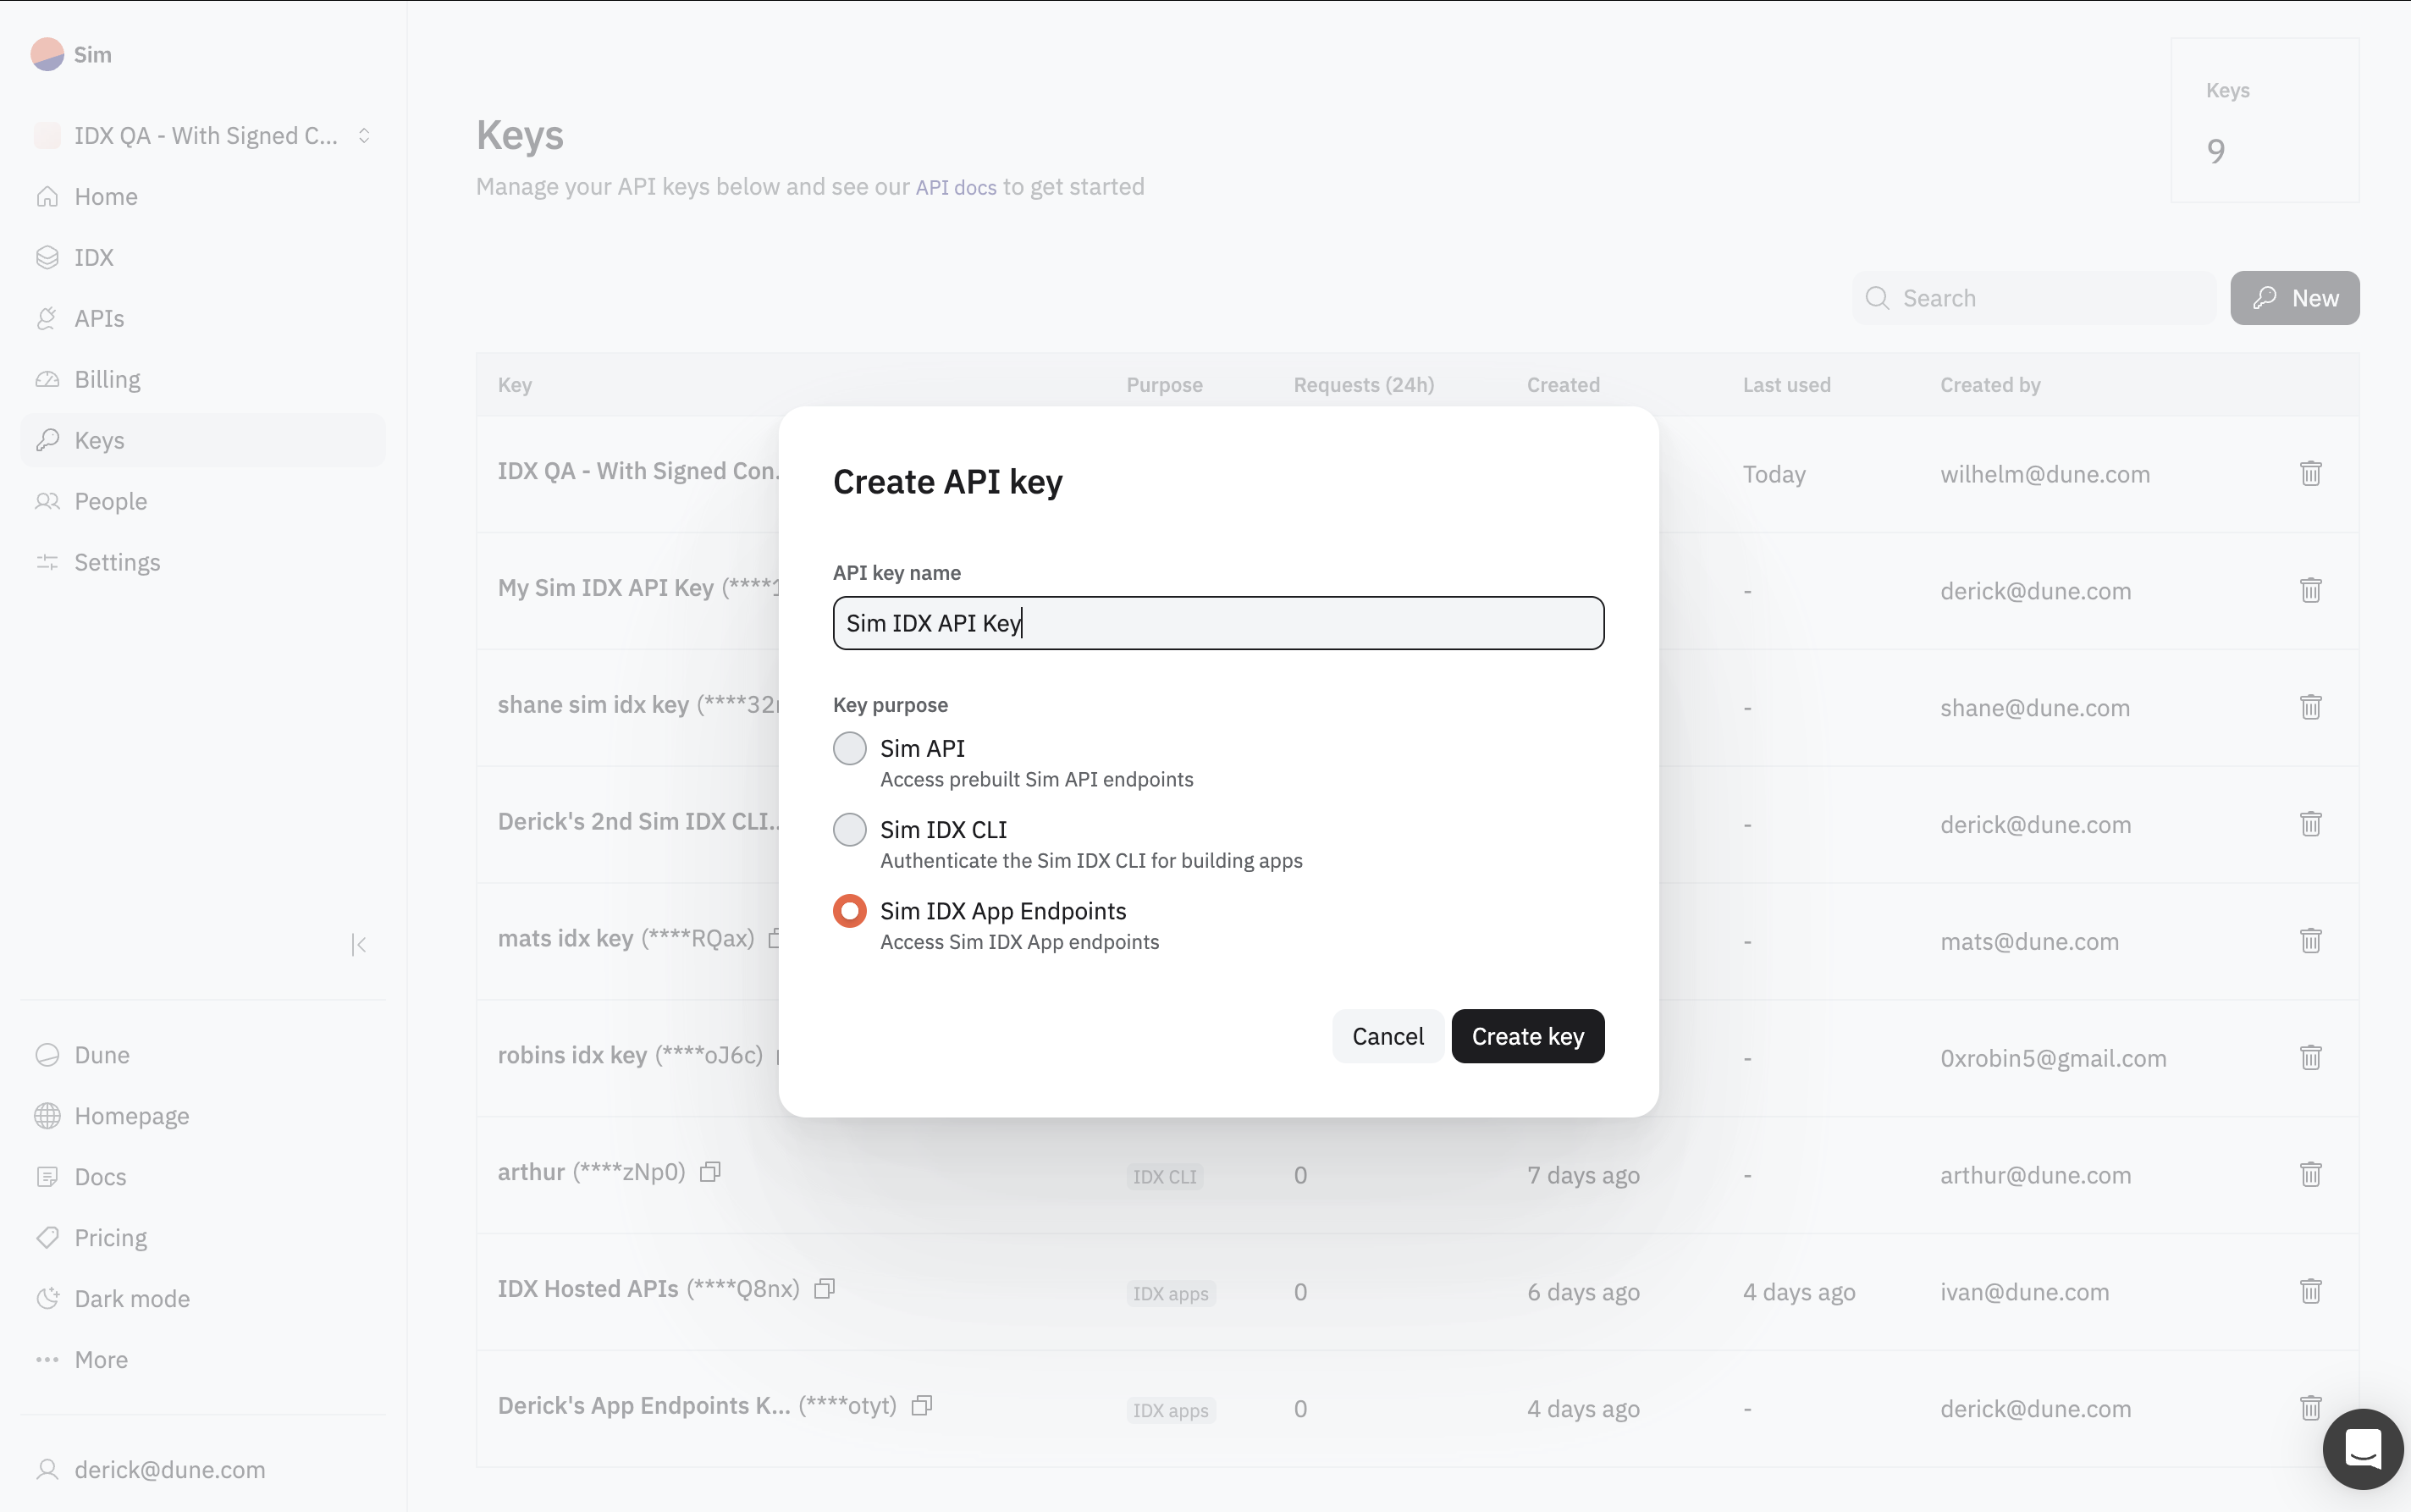
Understanding the Authentication Middleware
The authentication middleware is enabled by default in your API. When you create a new Sim IDX app, the boilerplate code inapis/src/index.ts already includes the necessary authentication setup:
apis/src/index.ts
middlewares.authentication is applied to all routes using the app.use("*", middlewares.authentication) line. This ensures that every endpoint in your API requires authentication when deployed.
Calling Your Authenticated API
Once your API is deployed, you must include your Sim IDX App Endpoints API key in theAuthorization header with every request.
Here is an example using cURL.
<your-api-url> with your deployment’s base URL and YOUR_SIM_IDX_APP_ENDPOINTS_API_KEY with a valid Sim IDX App Endpoints API key.
Wrangler Configuration
Your API uses awrangler.jsonc file in the apis/ directory for local tooling and build metadata. This file is already created when you initialize a new project. Sim IDX reads a minimal set of fields from this file during deployment. Other fields in this file are not used by the Sim IDX deployment flow.
Sim IDX deploys only the code that is reachable from your entrypoint during the build. Static files and local state are not packaged. Files on disk such as images, CSV or JSON blobs, or a local Wrangler state directory are not uploaded.
apis/wrangler.jsonc contains:
Local vs Deploy
Local development tools can sometimes access files on your machine. The deployed worker does not have a filesystem. Do not read from disk in your request handlers. If you need small reference data then embed it at build time as a TypeScript module import. If you need larger assets then host them behind HTTPS and fetch them at runtime.| Capability | Local dev (npm run dev) | Deployed on Sim IDX | What to do |
|---|---|---|---|
Read ./file.json | May appear to work | Not available | Embed at build time or fetch remotely |
Serve files from assets/ or public/ | May serve locally | Not packaged | Host externally and fetch |
Extra fields in wrangler.jsonc | May work locally | Not used | Keep only name, main, compatibility_date, compatibility_flags |
Deploy Your API
Once your repository is connected, shipping updates is as simple as pushing code. Push commits to themain branch to roll out a new production deployment. Push to any other branch to spin up a preview deployment with its own URL. This is useful for staging and pull-request reviews.
Sim IDX automatically builds your Cloudflare Worker and updates the deployment status in the dashboard. No CLI command is required.
Before pushing, review your
wrangler.jsonc and remove fields that are not name, main, or compatibility_date. Also make sure your handlers do not read from the filesystem. If you need data, either embed it at build time or fetch it from a remote source.